AdInfinitum
Super Active Member
- Joined
- Jan 12, 2012
- Location
- Thorndale, Ontario
Just for the record, this is not meant to be an acrylic "fan-boy" or "hater" thread...I love my 200gal acrylic, but am also more than aware of the material's limitations and the rules you have to follow to be successful.
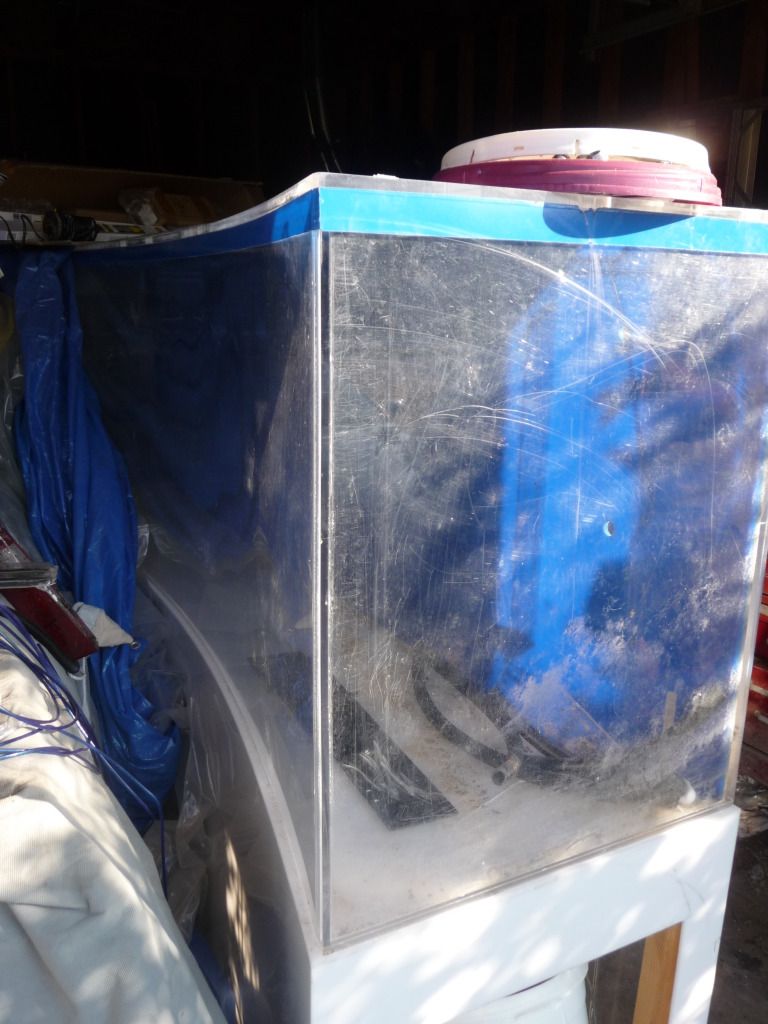
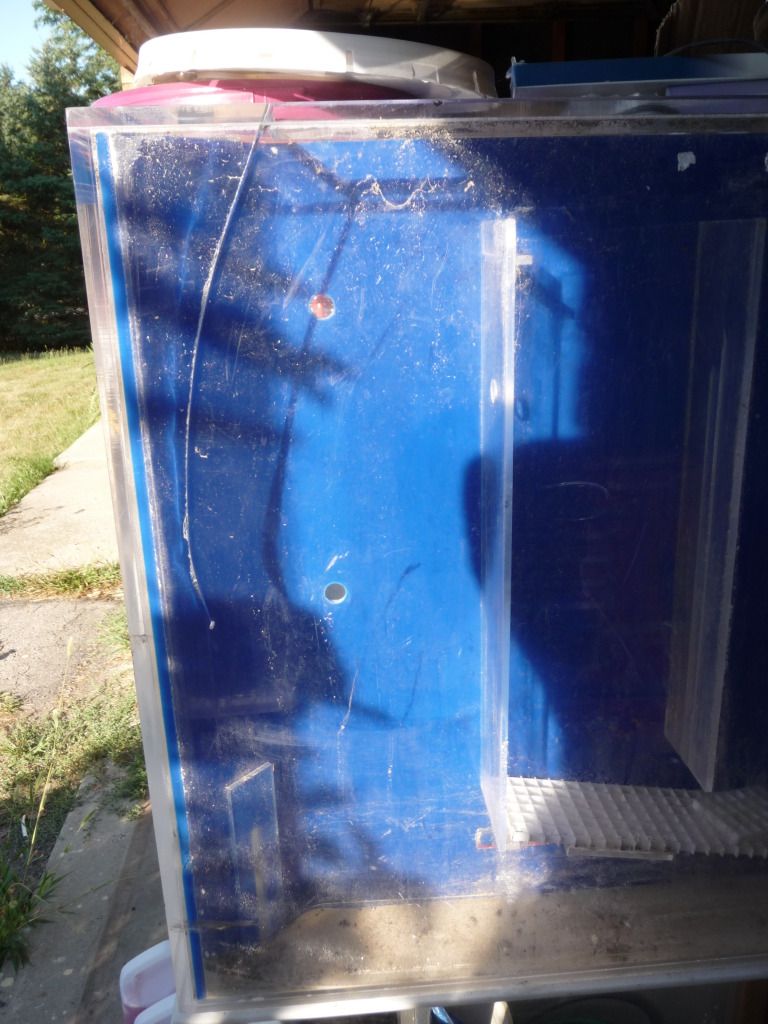
Searching Kijiji as we all do...I found an ad for a broken "huge acrylic tank". I'm probably not the only one here who has inquired about one of these "huge" tanks only to find out that it was a massive 55gal. This one seemed legit so I went expecting to come home with a bunch of acrylic from a failed DIY that i could use for various projects. What I found was lovely example of one of Tenecor's best designs. A 90x24x31(tall) Teneview (concave front...strongest and most optically neutral) with built in "simplicity plus" filtration (FW oriented bio-balls wet dry) that had been treated improperly, repaired incorrectly and ultimately failed catastrophically...
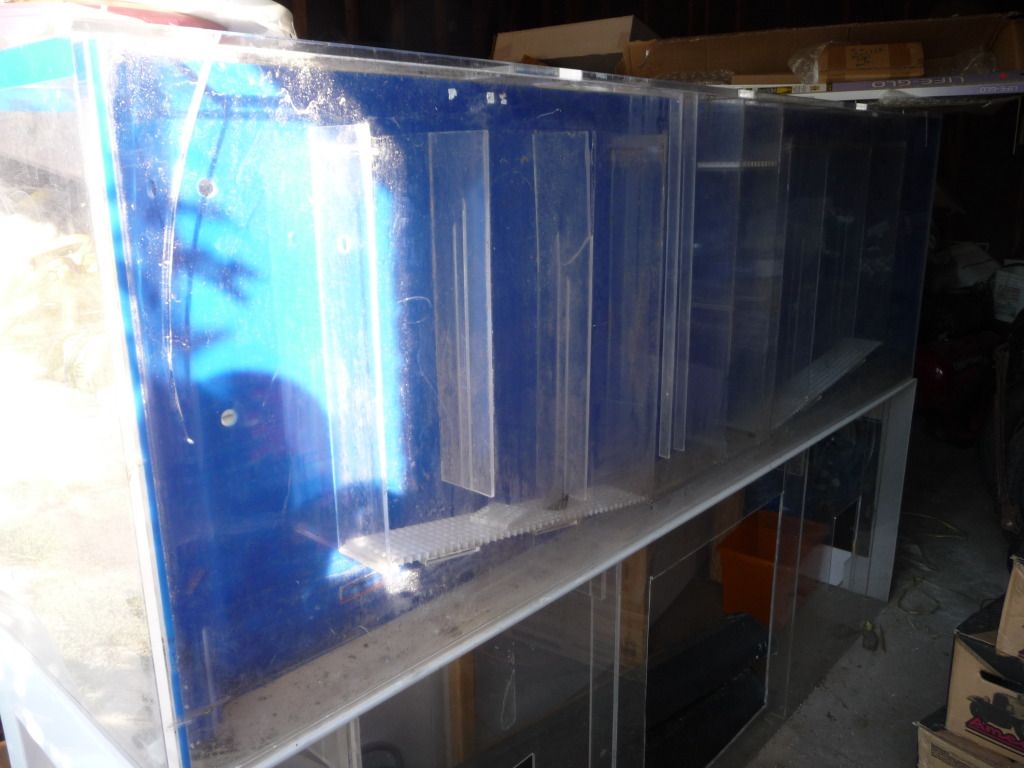
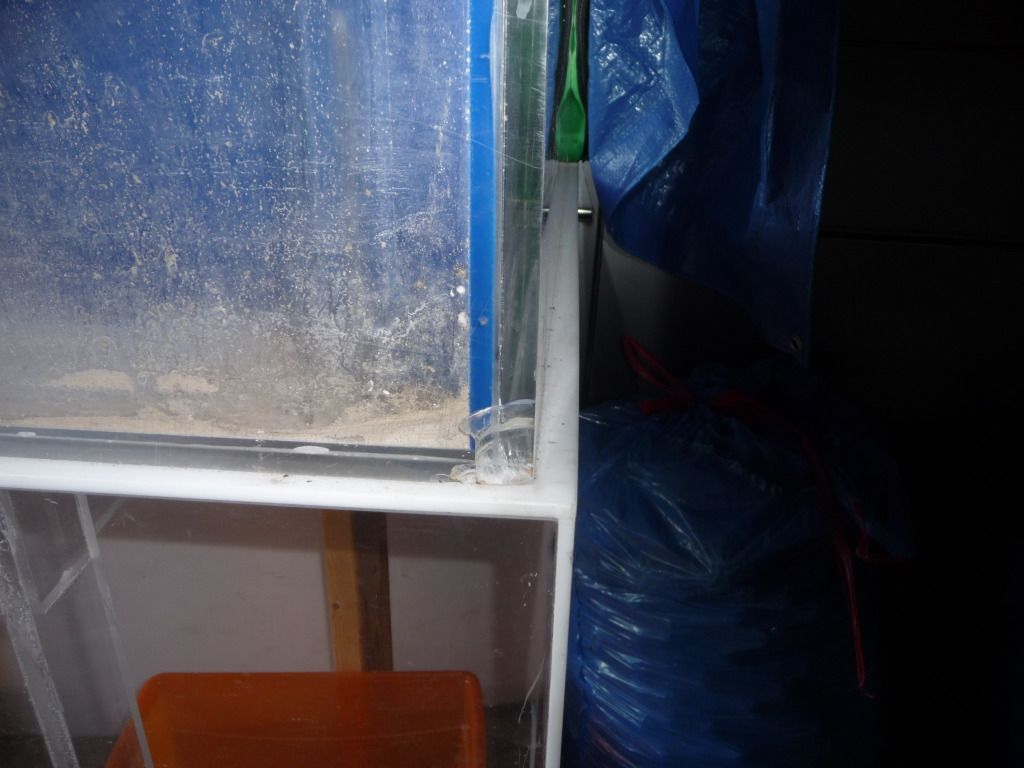
The tank is still sitting on its original custom acrylic stand. In the rear view you can see the large extra openings that were cut into the stand to allow access for a sump with no regard for the loss of structure that would cause...see 2x4's now holding it up even while empty...
The Tenecor plate is still inside and they call it a 270 but with the concave front I think that's pretty optimistic...more like 240ish maybe.
The original owner enjoyed it for years as a FW tank and all was well until the Reef bug hit...then it went down the road to failure.
Reef + 31" depth= Halides Halides=Heat
At 290F Acrylic is soft enough to bend, stretch and even extrude into any shape you want, at 350F it is easily combustible. Therefore if you put a 250watt HQI directly over the center brace of a large acrylic tank, when it gets hot, instead of absorbing the bowing stresses on the front and rear panels by deflecting downward, it will just stretch and fail.
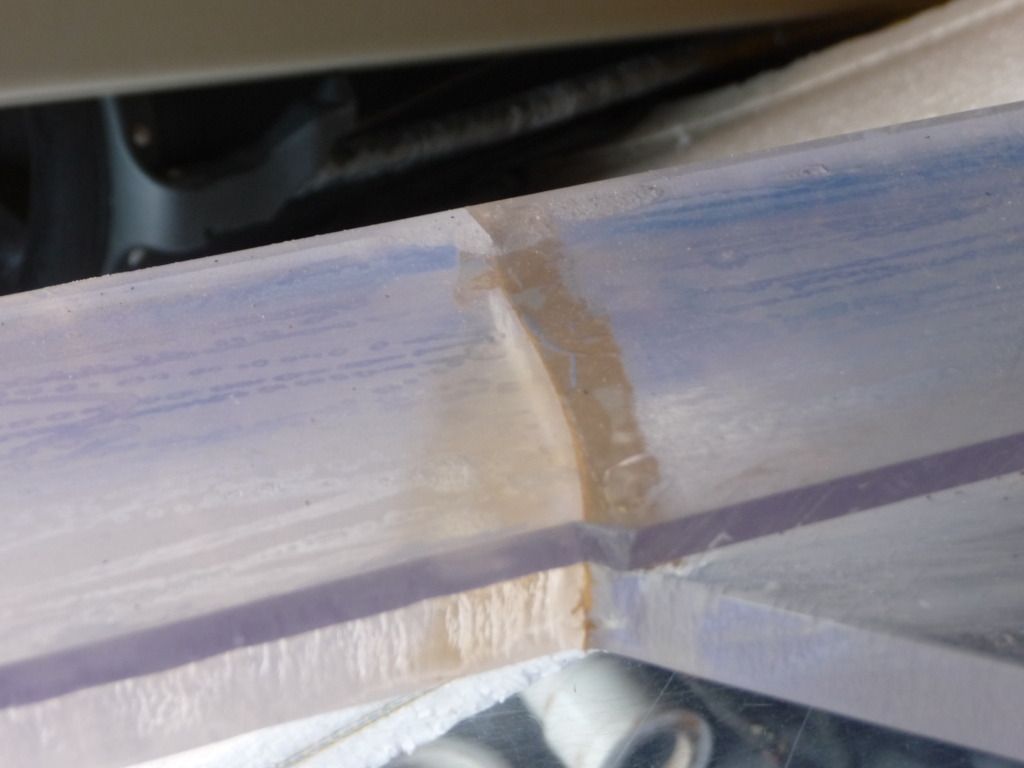

Then, not recognizing the important structural role that the center brace plays, the repair of silicone in the cracks and laminating a thin piece of acrylic over the cracks with more silicone handled it cosmetically but not structurally. Eventually, since the concave front panel is very strong the rear panel gave where the holes for the filtration system left the least rim bracing.

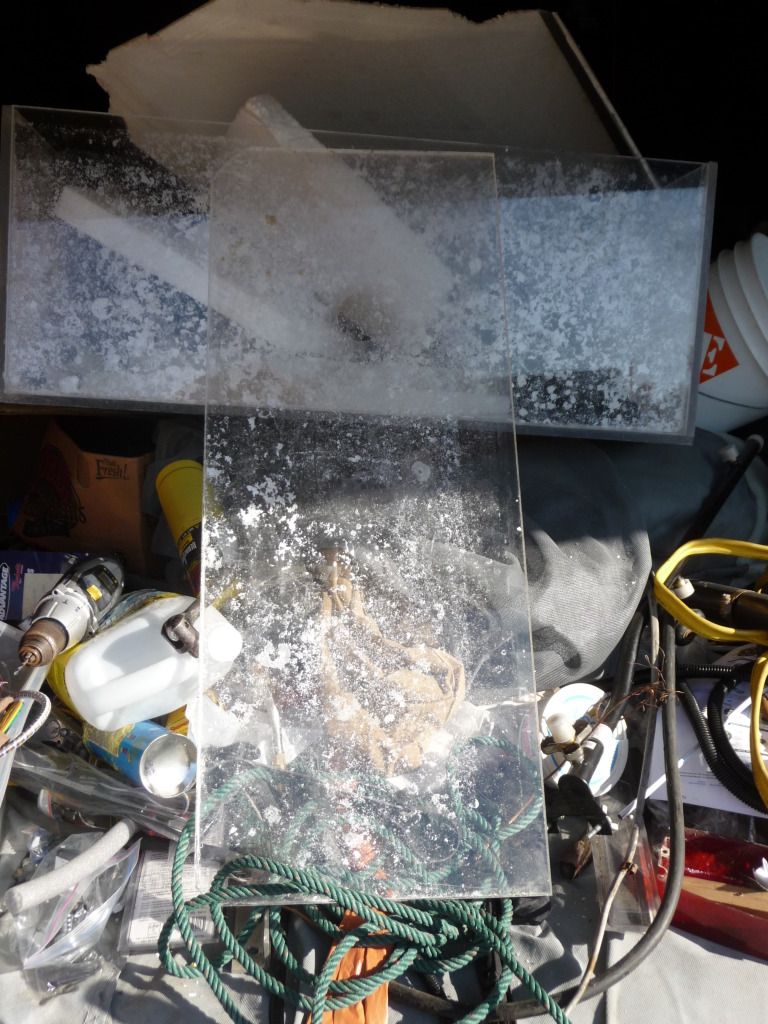
According to the buddy who had inherited the tank after storing it in his garage and eventually realizing that he was in over his head to try to repair it, when it split it flexed wide open and dumped 60% of the water almost instantly and the crack was flexed back enough that fish came out as well as water. Then in the ensuing panic (he was over at the owner's place watching a game in the family room below the tank...) as someone was leaning on the tank trying to get things out, the stand buckled on one end and the tank slid off causing this impact fracture...
So a hundred bucks and gas to Toronto got me tank, stand a couple of powerheads and a garbage bag full of bio-balls (does anyone use them for anything??)... worth it for one of the acrylic panels.
Luckily for me acrylic is almost infinitely repairable and the damage to this tank will not be too hard to take care of...but like any old hot-rodder will tell you "If it breaks it's a chance to fix it faster.."
The seaming on the front panel is perfect and I don't want to mess with it but I don't want the internal filter and I do want more bottom area so the tentative plan is to remove the back panel and add an angled and bevel cut section to the back to give me 12-18" more area without touching the original front.

Most of the materials I need to do that will come from the next DIY disaster that I will add to the thread.
Searching Kijiji as we all do...I found an ad for a broken "huge acrylic tank". I'm probably not the only one here who has inquired about one of these "huge" tanks only to find out that it was a massive 55gal. This one seemed legit so I went expecting to come home with a bunch of acrylic from a failed DIY that i could use for various projects. What I found was lovely example of one of Tenecor's best designs. A 90x24x31(tall) Teneview (concave front...strongest and most optically neutral) with built in "simplicity plus" filtration (FW oriented bio-balls wet dry) that had been treated improperly, repaired incorrectly and ultimately failed catastrophically...
The tank is still sitting on its original custom acrylic stand. In the rear view you can see the large extra openings that were cut into the stand to allow access for a sump with no regard for the loss of structure that would cause...see 2x4's now holding it up even while empty...
The Tenecor plate is still inside and they call it a 270 but with the concave front I think that's pretty optimistic...more like 240ish maybe.
The original owner enjoyed it for years as a FW tank and all was well until the Reef bug hit...then it went down the road to failure.
Reef + 31" depth= Halides Halides=Heat
At 290F Acrylic is soft enough to bend, stretch and even extrude into any shape you want, at 350F it is easily combustible. Therefore if you put a 250watt HQI directly over the center brace of a large acrylic tank, when it gets hot, instead of absorbing the bowing stresses on the front and rear panels by deflecting downward, it will just stretch and fail.
Then, not recognizing the important structural role that the center brace plays, the repair of silicone in the cracks and laminating a thin piece of acrylic over the cracks with more silicone handled it cosmetically but not structurally. Eventually, since the concave front panel is very strong the rear panel gave where the holes for the filtration system left the least rim bracing.
According to the buddy who had inherited the tank after storing it in his garage and eventually realizing that he was in over his head to try to repair it, when it split it flexed wide open and dumped 60% of the water almost instantly and the crack was flexed back enough that fish came out as well as water. Then in the ensuing panic (he was over at the owner's place watching a game in the family room below the tank...) as someone was leaning on the tank trying to get things out, the stand buckled on one end and the tank slid off causing this impact fracture...
So a hundred bucks and gas to Toronto got me tank, stand a couple of powerheads and a garbage bag full of bio-balls (does anyone use them for anything??)... worth it for one of the acrylic panels.
Luckily for me acrylic is almost infinitely repairable and the damage to this tank will not be too hard to take care of...but like any old hot-rodder will tell you "If it breaks it's a chance to fix it faster.."
The seaming on the front panel is perfect and I don't want to mess with it but I don't want the internal filter and I do want more bottom area so the tentative plan is to remove the back panel and add an angled and bevel cut section to the back to give me 12-18" more area without touching the original front.
Most of the materials I need to do that will come from the next DIY disaster that I will add to the thread.
")