75 Gallon Custom Rimless and Elite Aquatics Sump

Austin

New Member
Joined
Mar 17, 2014
Hi All,

New guy to the site as I was referred by DeezNutz, so I thought I would post my build thread here.

This is my first Saltwater tank, and first tank in a while since taking down my freshwater planted tanks that I used to do. So I am open to all help and advice should I make a stumble along the way.

I will condense my build thread from a previous forum and just provide all the good stuff (lots of pictures)


My tank will be a coming from Miracles and is a custom rimless measuring 40x24x18 with an external overflow, I had originally tried to get a ghost overflow but missed the preorder and there has been no ETA on when they are going to sell them again so I had Miracles build me the overflow along with the tank.

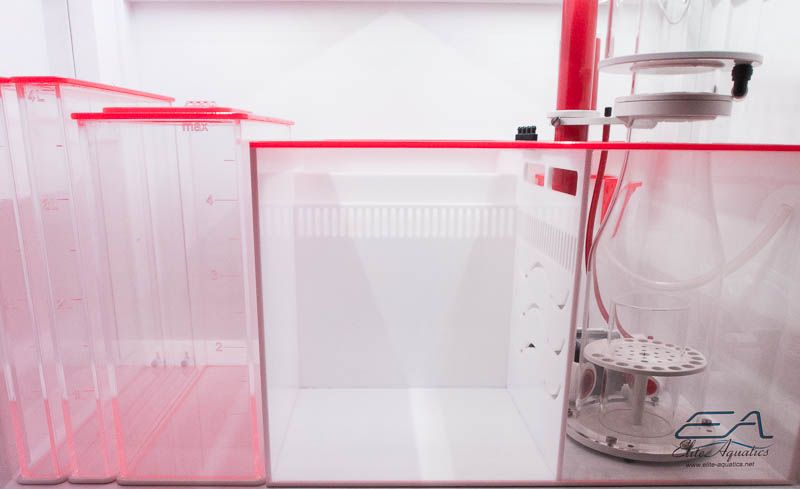
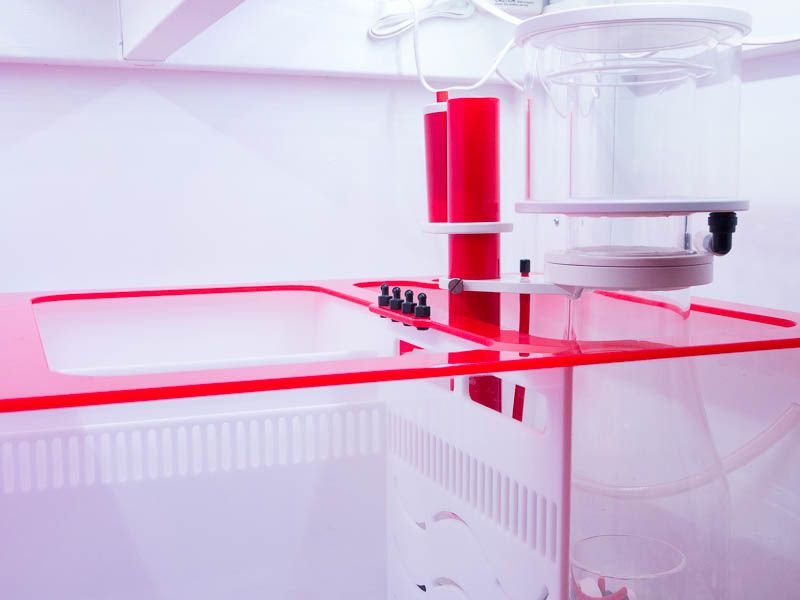
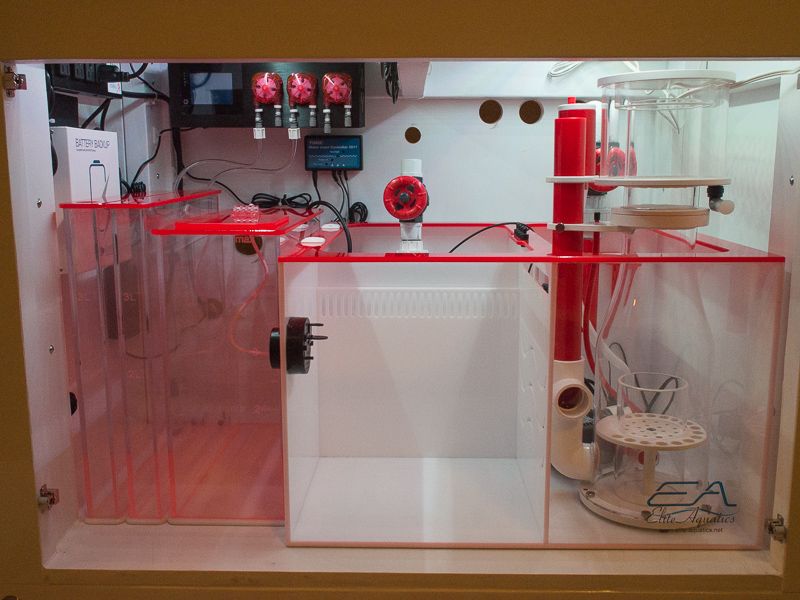
The sump I am using I kinda lucked out on as Elite Aquatics who makes them had a custom one that was returned that was exactly what I wanted size and color, they even went so far as to match my ATO and dosing containers (pics soon just read a bit more), I really lucked out as they stopped doing custom work.

Other noteable equipment is as follow

Hydra 52 with controller
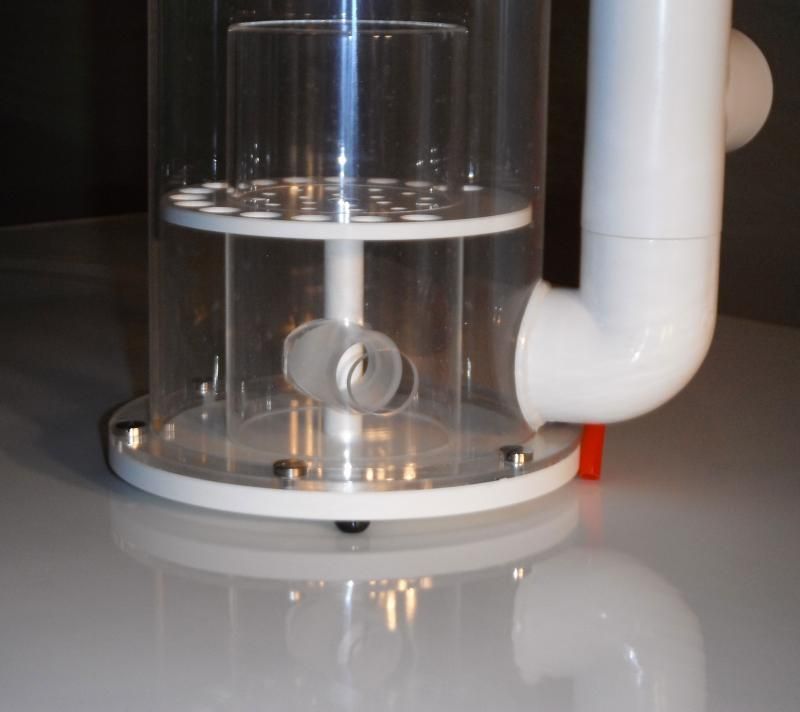
Vertex 150 Skimmer
Vertex Dosing Pump
MP40W with a Battery backup
Neptune Apex with Lab grade PH and Temp WXM module (will get AWM as well now with soon to be  Fusion)
Tunze 3155 ATO
Sicce Return Pump

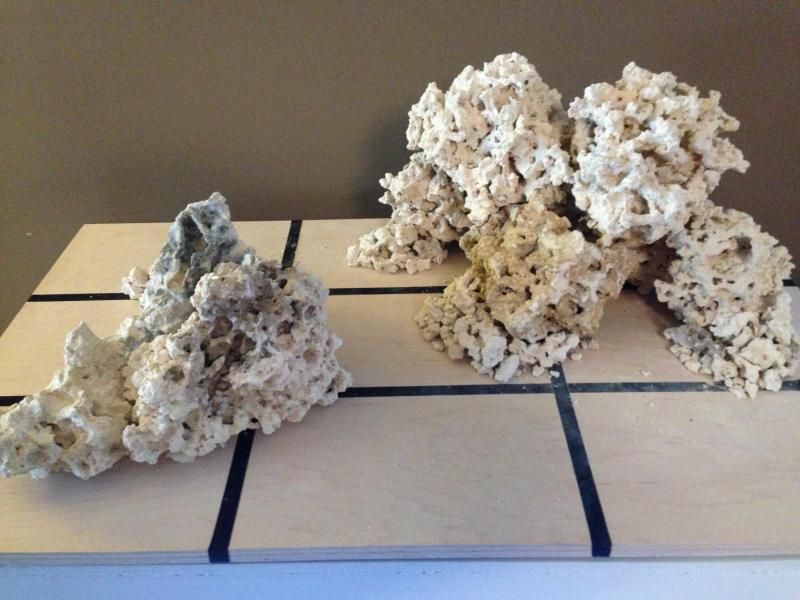
I went with 60lbs of Dry Macro rock to avoid any unwanted hitchhikers, and it has been curing in a Brute container since January with some nice pieces of Live Rock and have/had been dosing ammonia to ensure it is cycled before the tank arrives.

My fish list consist of the following although none of this is set in stone or purchased yet.

2 x Amphiprion Percula (True Percula Clownfish)
1 x Paracheilinus carpenteri (Carpenter's Flasher Wrasse)
1 x Paracheilinus cyaneus (Blue Flasher Wrasse)
1or2 x Pseudanthias bartlettorum (bartletts anthias)
1or2 x Pseudanthias rubrizontaus (Tricolor, redbelted anthias)


Depending on available stock
1 x Ctenochaetus Strigosus (Yellow Eye Tang)
1 x Ctenochaetus Flavicauda (White Tail Bristletooth Tang) — 1st Choice ( if I can find a red one with white tail)
or
1 x Ctenochaetus Tominiensis (Bristletooth Tomini Tang)


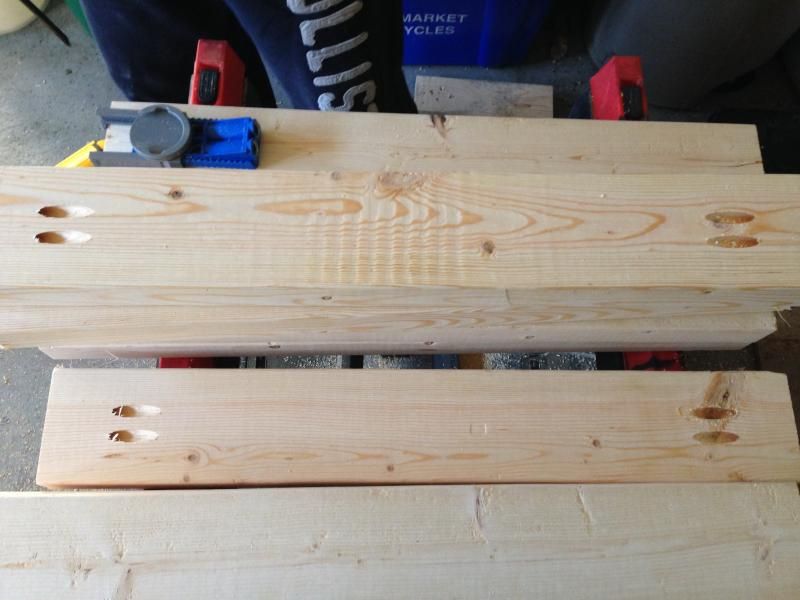
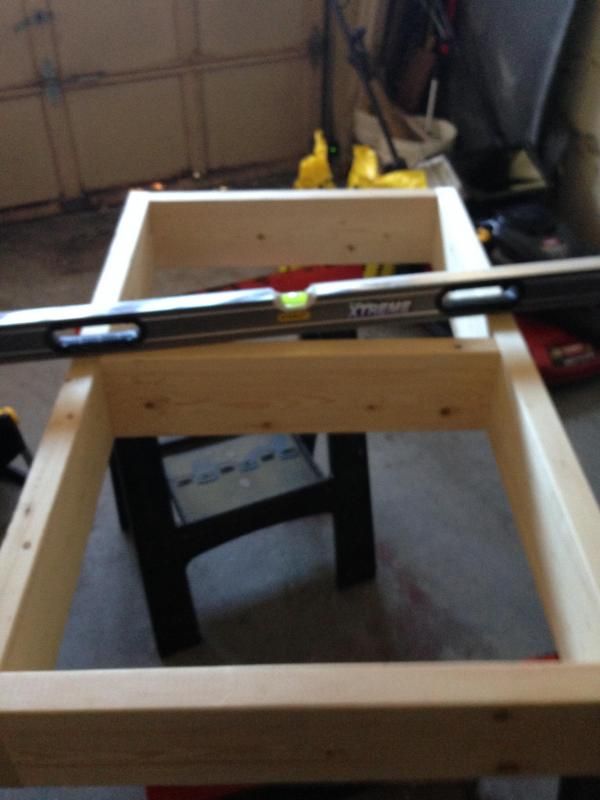
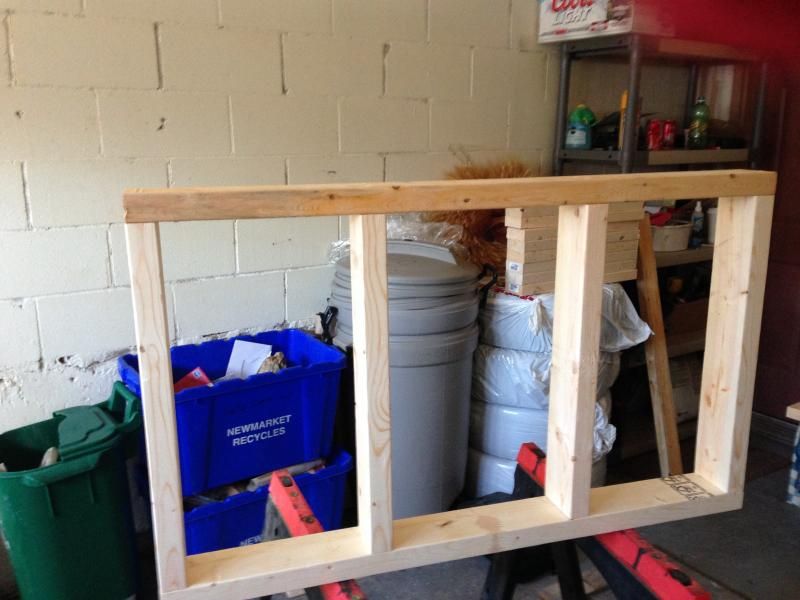
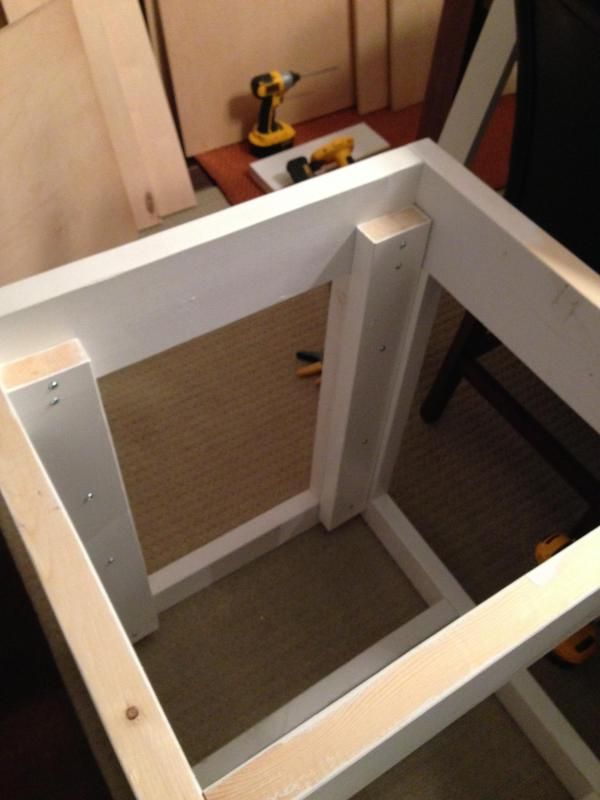
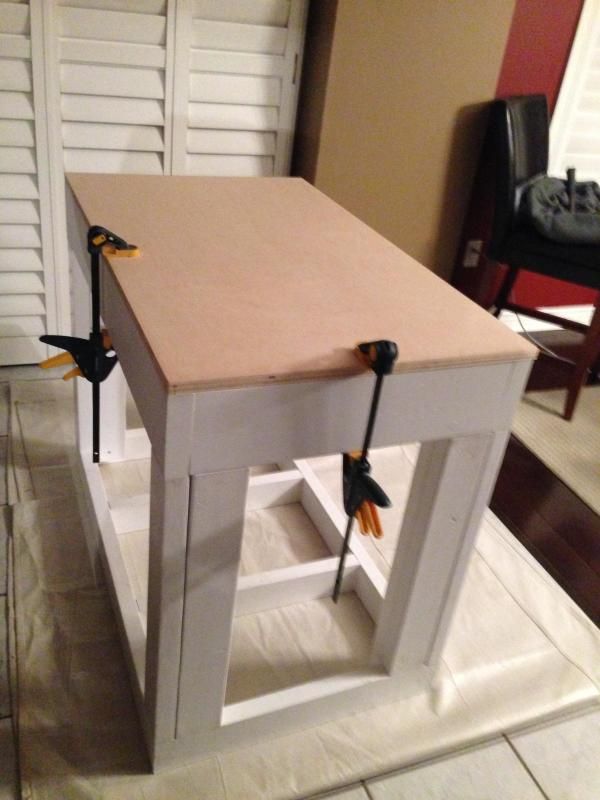
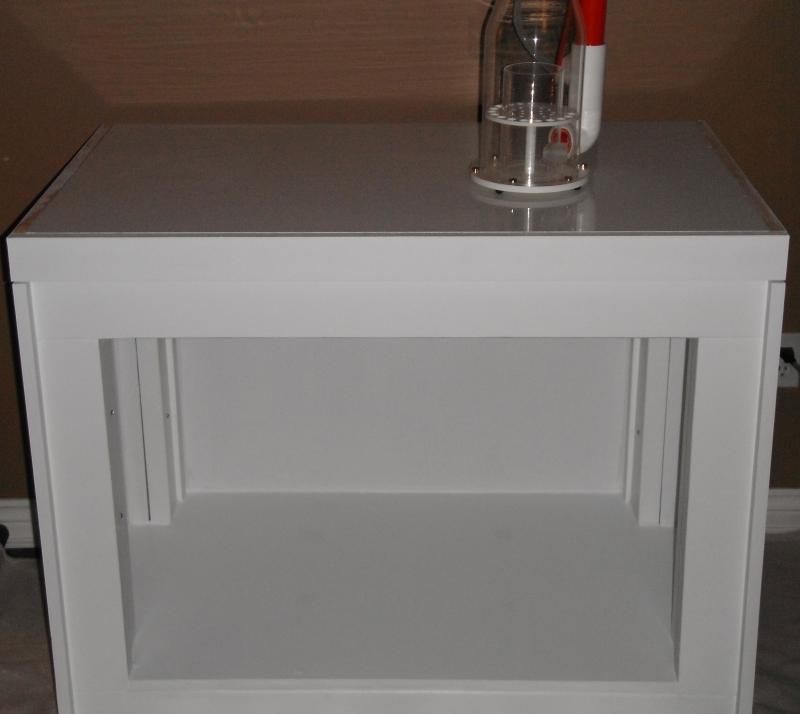
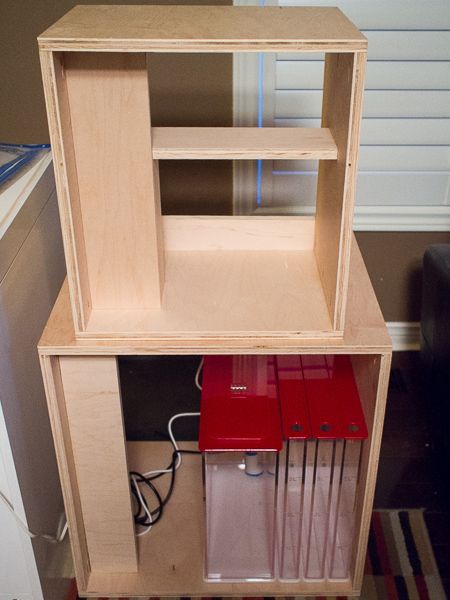
The stand to house this all has been built by me following a link on another forum and should do the trick although I had to build a secondary stand to house all the equipment as I was concerned with moisture affecting the electronics.

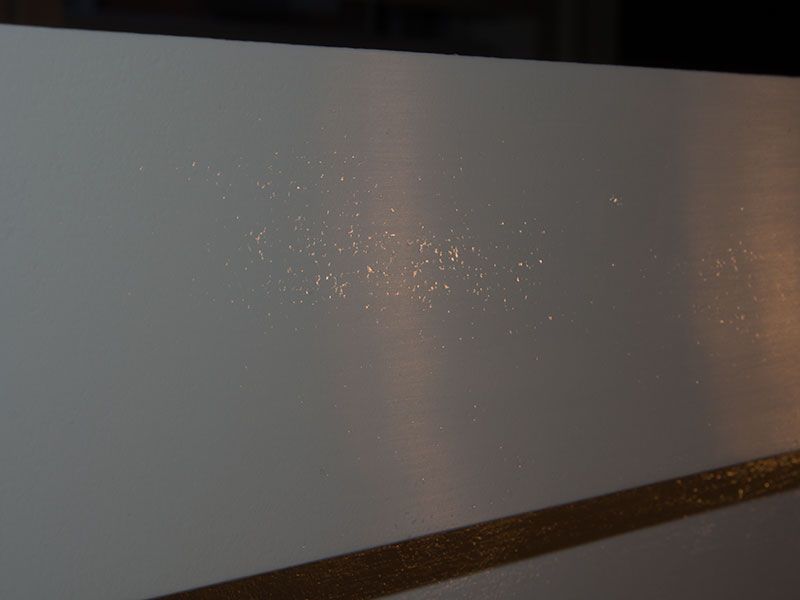
Stand is a high gloss white color to match a coffee table I have in the same room. If anyone would like a detailed step by step of how I did the finish on the stand I can post my writeup from another forum for ease.


Ok so enough chat on to some pictures.

tbuild5.jpg


tbuild1.jpg


tbuild3.jpg


tbuild10.jpg


tbuild11.jpg


polished.jpg


stand4.jpg


stand2.jpg


relection.jpg


MiraclesAustin3.jpg


MraclesAustin1.jpg


20140206-tankbuild-6.jpg


20140206-tankbuild-10.jpg


20140206-tankbuild-16.jpg


20140206-tankbuild-16.jpg


Too Crammed

20140224-untitled-10.jpg


New Cabinet

20140308-untitled.jpg


Dry Run Aquascape


scape1.jpg


I look forwarding to hearing your guys inputs, things that I am trying to sort out are, Ultimate cleanup crews and also recommendations on corals.

Also main tank should be arriving in 1-2 weeks from today.
 

spyd

Super Active Member
Joined
Jan 31, 2011
Location
Kitchener, Ontario
Looks sweeeet!!! That is a very nice and clean sump area you have there! The only thing I would suggest is getting a hold of JT and have him build a custom screen for your rimless tank. He can make them where they sit flush with the top so you still keep your rimless look. I am just saying that because you will need something to keep those anthias and wrasses from jumping and that is the best option to keep the look of your tank in tact.

For corals, I am assuming you are going with more SPS based on the fact that you have a doser?

For a CUC, I suggest a combination of Nassarius (for the sand bed), Mexican Turbos (for Rock and glass) and Trochus (for rock and glass since they can right themselves if they fall over). That has all ways been my go to snails and all seem to do their jobs very well.
 

Austin

New Member
Joined
Mar 17, 2014
Thanks for the kind words,

I should have mentioned that I do have a screen but I will keep JT in mind if I dont like how the screen looks and also maybe for a nice frag tank down the line.

As for Corals, I would like a mixed reef so some LPS SPS for sure also like zoa's etc so a little bit of everything....I am just researching alot on placement and what works/doesnt work together.

So all you aquascapers out there feel free to lend a hand with my proposed scape and give me some idea on what you would place where if it was your aquascape :)

Spyd thanks for the ideas on CUC that seems to be a go to crew, I also was told about a particular Urchin but cant recall the name, my main concern is keeping the sand bed nice and clean as I am trying to have a large open area in my scape and don't want dirty sand.
 

Austin

New Member
Joined
Mar 17, 2014
Couple more photos,


Spot where the tank will be and the new cabinet to hold all the electronics, I wasn't quite comfortable with all the electronis in the sump area due to moisture ( I have a fan installed but better safe than sorry )

Just need to buff the new cabinet to a high shine like the main stand.
 

MrHermit85

Active Member
Joined
Mar 19, 2013
Location
London, Ontario
Wow, beautiful setup and equipment!!! I love the rockscape , your fish will have plenty of room to swim!  You could even run an arch between the back right structure and the front one. I have always been a fan of watching fish swimming through arches.
 

Austin

New Member
Joined
Mar 17, 2014
Petercar link said:
there was a built thread in here one time. where he built a side slot on outside stand where it houses all the electronics amd has a door to hide it

I have seen a few like that as well....its what I should have done, but seeing as I went through all the time to do the finish on the stand it was easier to build a second one rather than hack up a finished product so to speak. ( lot of work to do a high gloss smoth finish think piano finish )


MrHermit85 link said:
Wow, beautiful setup and equipment!!! I love the rockscape , your fish will have plenty of room to swim!  You could even run an arch between the back right structure and the front one. I have always been a fan of watching fish swimming through arches.

Thanks for the compliments Hermit. Not a bad idea with the arch I will see how that looks once the tank arrives as all my rock is curing until the tank arrives.

I really like tanks that have open areas or use negative space, and i think it should work/match the openness of the room the tanks going in.
 

Poseidon

Distinguished Member
Joined
May 15, 2012
Location
SW Ontario
i would steer clear of urchins as they love coraline, and i like coraline. :)
but it looks like a sweet build, you've taken the approach- do everything right the first time and thats the best approach to take :)
 

jeffopentax

Super Active Member
Joined
Nov 11, 2013
Location
Brantford, Ontario
...my main concern is keeping the sand bed nice and clean as I am trying to have a large open area in my scape and don't want dirty sand.

I have a diamond goby.  Keeps my sand insanely clean,  but tends to scape it to his liking.


Sent from my iPhone using Tapatalk
 

Austin

New Member
Joined
Mar 17, 2014
Poseidon link said:
i would steer clear of urchins as they love coraline, and i like coraline. :)
but it looks like a sweet build, you've taken the approach- do everything right the first time and thats the best approach to take :)

Thanks Poseidon, I cant recall the urchin I was told about but good to know about the coraline issue, and thanks for the kind words on the build....have been doing a lot of research to make sure it is done right with some help and guidance from Deeznutz too.


jeffopentax link said:
...my main concern is keeping the sand bed nice and clean as I am trying to have a large open area in my scape and don't want dirty sand.

I have a diamond goby.  Keeps my sand insanely clean,  but tends to scape it to his liking.

I will take a look at that Goby great info thank you.
 

deeznutz

Member
Joined
Mar 14, 2014
Location
Newmarket, Ontario
Hey Austin, glad you showed up.  Great build so far.  Looks fantastic!

I'd like to see your process for the high gloss stand.

As for urchins, I find the best ones are tuxedo urchins.  They eat everything, including the dreaded coraline algae :-[
Unlike others, I hate that stuff!  But it is a sign of good things to come when it starts to take hold.  It's just a pain to scrap off.  The longer you wait the thicker it gets.

As for clean sand.  Orange Diamond back gobies are great, but they are jumpers.  I just lost one last weekend.  Got myself some fish jerky on the ground lol.

Another great critter is a strawberry conch.  One will be plenty.  I've always liked sand sifting starts as well, but your sand bed should be mature to keep one for any length of time.

BTW, Miracles is putting my tank together this week.  We should be receiving our tanks at the same time ;)  Now I just have to figure out how I'm going to pay for it lol
 

teebone110

Distinguished Member
Joined
Jan 5, 2011
Location
London, Ontario
Website
www.thefragtank.ca
deeznutz link said:
Hey Austin, glad you showed up.  Great build so far.  Looks fantastic!

I'd like to see your process for the high gloss stand.

+1,  post up some more pics/ links and don't worry about "other forum" etiquette around here, as we are all relaxed at TFT  ;)

Welcome, your new build looks  8) 8) 8)
 

Austin

New Member
Joined
Mar 17, 2014
deeznutz link said:
Hey Austin, glad you showed up.  Great build so far.  Looks fantastic!

I'd like to see your process for the high gloss stand.

As for urchins, I find the best ones are tuxedo urchins.  They eat everything, including the dreaded coraline algae :-[
Unlike others, I hate that stuff!  But it is a sign of good things to come when it starts to take hold.  It's just a pain to scrap off.  The longer you wait the thicker it gets.

As for clean sand.  Orange Diamond back gobies are great, but they are jumpers.  I just lost one last weekend.  Got myself some fish jerky on the ground lol.

Another great critter is a strawberry conch.  One will be plenty.  I've always liked sand sifting starts as well, but your sand bed should be mature to keep one for any length of time.

BTW, Miracles is putting my tank together this week.  We should be receiving our tanks at the same time ;)  Now I just have to figure out how I'm going to pay for it lol


Thanks for the info buddy, great news on your tank....looks like we are both going to be busy with setups :)


teebone110 link said:
+1,  post up some more pics/ links and don't worry about \"other forum\" etiquette around here, as we are all relaxed at TFT  ;)

Welcome, your new build looks  8) 8) 8)

Thanks Teebone, seems like a great bunch here glad to be a part of it.
 

Austin

New Member
Joined
Mar 17, 2014
As requested here is some info on how I finished my stand. Pictures will be at the bottom, some steps were easier to show than others so I will have some captions next to the photos.


On to the guide..........

I will say first that "Prep" is the most important part of it all second depending on what wood you use some steps may or may not be needed will really depend on the amount of grain on the wood.

The wood I used for the skin ( 2x4 frame underneath ) was paint grade 3/4" plywood which comes prefinished and should be smooth, I did a light sand with 400 grit paper to ensure it was as smooth as I wanted it.

The next step was to prime the wood to hide the wood grain so I then applied two coats of Kilz Primer doing a light sand of 400 grit sand paper between coats to knock down any raised grains on the wood.

Once the primer was cured next up was 3 coats of a Brilliant White Melamine paint again sanding between each coats very lightly with 400 grit sand paper to knock down any residual rising of the grains in the wood.

Next up was the part I was kind of worried about, the top coat. I opted to use a water based Varathane, the reason was very low VOC / Odors as I would have to be doing this inside due to the time of year ( snow and cold ) also made clean up easy and it dries fairly quickly ( good and bad as it sets up quickly so work fast ).

The best tools/brushes I found for applying this took a bit of trial and error as the Varathane sets up quickly. I used a special low nap 4" roller and then back brushed it with a 3" foam brush. When I tried using a regular brush it left a lot of brush strokes and I think this was due to how fast the water based Varathane sets plus a little too much working of the product by me.

Once I found the best combo of tools I put on 5 coats of the Varathane, now that may seem like a lot but being water based and how fast it sets you can re-coat in 2 hours, between each coats I again sanded with 400 grit sand paper very lightly to remove any imperfections, as you keep adding layers the Varathane kind of melts/melds together provided you haven't let it cure for too long.

Once I had a thick enough coating I let it set for 3 days....now I will say that you can let it set longer and while I was researching I saw varying reports on how long to wait before trying to "Rub out the Finish" as they call it.

Now at this point it kind of seems like your working backwards. In order to get an even and glossy finish you actually have to sand the gloss away temporarily. I started with a 600 grit Wet Sand paper and a bucket with soapy water, working in small sections I sanded it down until I saw very little gloss left. I then switched to a 1500 grit Wet Sand paper to get the rest of the glossy parts. One thing I will say is work slowly and clean the section your working on with a clean rag as you want to make sure you don't go through all the Varathane and hit the paint layers. ( Be careful on edges / corners as they are the easiest to burn through )

At this point if all has gone well you should have a dull looking finish showing scratches throughout.

Once done with the Wet Sanding I switched to my Porter Cable Random Orbital which I use for car detailing and some Meguiars automotive polishes. First I used a firm Orange pad and a heavy/medium cut polish following the instructions on the package for two passes ( basically the whole piece done twice ) followed by a wipedown with a micro fibre cloth. At this point you can start seeing the gloss return. The next step was with a softer blue pad and a Finer Polish ( again 2 passes ) following the same instructions on the package and wipedown again. At this point its looking really good.

I finished it off using a soft black pad and a glaze ( very little cutting power ) followed by another wipedown and the final step was hand waxing.


Here are some photos of the process


This is a shot of the stand presanding

standpresand.jpg


This is the shot after starting with 600 grit wetsand paper, the goal here is to basically take all the gloss away, what you will see is some small flecks of gloss left, you have to be careful not to go too far back down to paint so this is where I switched to 1500 grit paper.

600wetsand.jpg


This is the final sand with 1500 grit wetsand paper, after using the 1500 grit wet sand paper you should be left with a dull scratchy finish like below

1500wetsand.jpg


This is a shot of it after final polish, this was the hardest part to shoot in the light I had and each buffing stage doesn't photograph well.


polished.jpg


I hope that helps a bit, feel free to ask any specific questions if I wasn't clear or missed something.
 

Austin

New Member
Joined
Mar 17, 2014
curiousphil link said:
Gorgeous looking setup!  Excited to see it with water :)

You and me both :)

benzzz link said:
Welcome and wow! that is an amazing set up so far. Can't wait to see more progress on this build

Thanks Benzzz, I will do my best to keep it updated.

sunnykita link said:
Wow ! Looks like it's going to be fabulous! Great job on the finish on the stand, sounds like a lot of work, but worth it in the long run !

Thanks, the stand turned out better than some expected including myself.
 
Top