Boga
Active Member
- Joined
- Jan 12, 2012
- Location
- Dorchester, Ontario
In progress of building my LED fixtures for the new 125 gal DT. Right now I am running T5's from the old 55 g setup :?. I know!
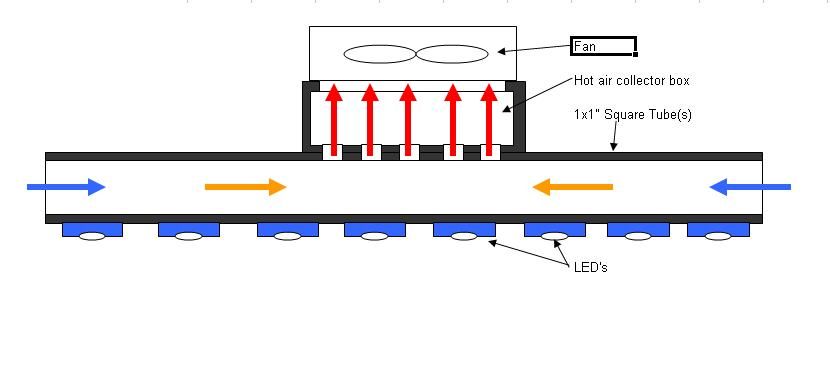
I will use an exhaust fan to move the air through four square tubes (1x1”, 30" long). The tubes are connected to a collector box, where the fan is pulling the hot air out. There are going to be two fixtures covering more than 60 inches in length.
Materials for each fixture:
- Long tubes: aluminum square tube 1x1”, 0.096” wall thickness, 30” long, 4 pcs.
- Short spacers: aluminum square tube 1x1”, 0.096” wall thickness, 3” long, 9 pcs.
- Box: 1/8 aluminum plate, 1/8 1x1” channel.
- the parts are going to be glued with thermal paste and reinforced with metal screws.
- LED's will be secured with bolts. I will use thermal compound Artic Silver 5.
- 14 Royal Blue LED’s.
- 14 White Cool LED’s.
- 4 or 5 UV LED’s.
- 1 or 2 Red, 1 or 2 Green LED’s.
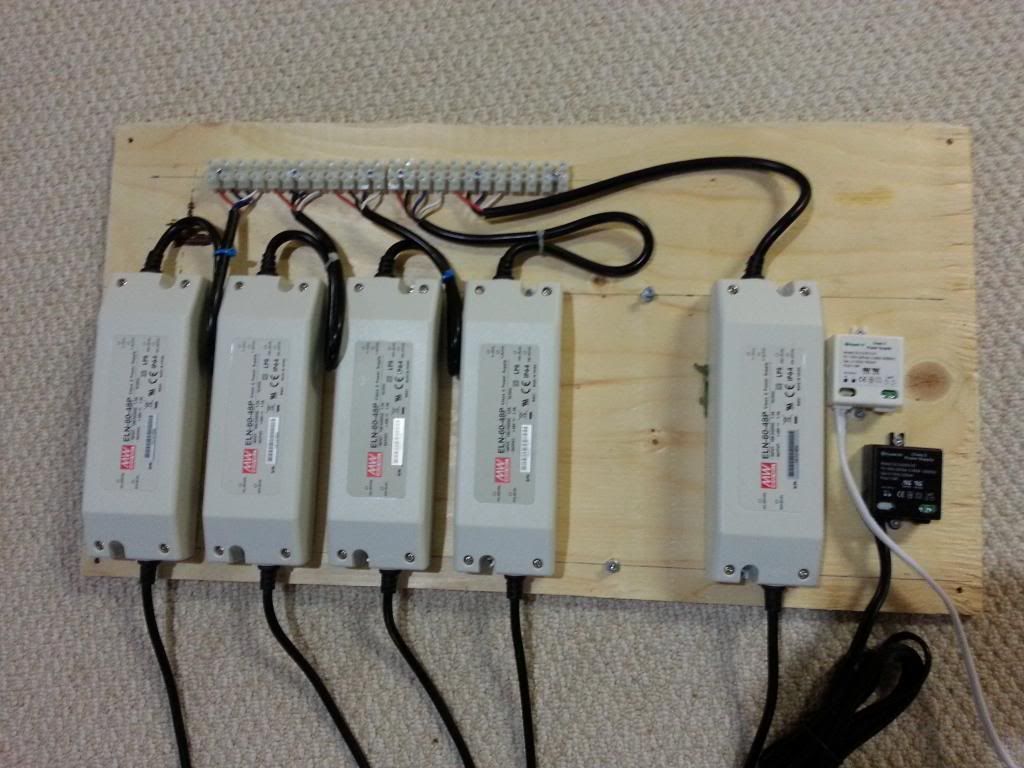
- 3 Mean Well ELN-60-48P dimmable drivers.
- 4 lunar LED's + driver.
- fan: 3.5” dia, 12V DC
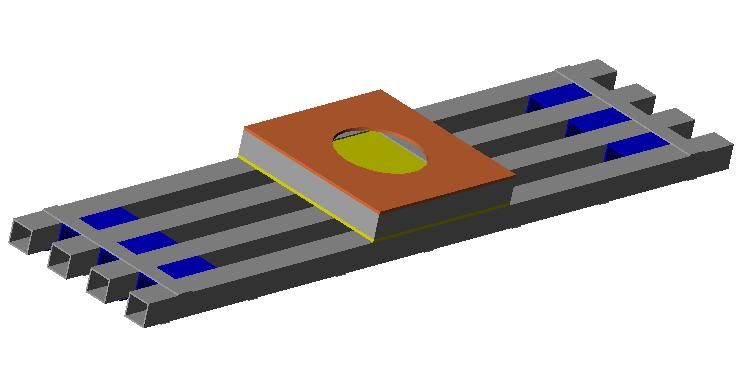
Fan side. Fan not shown in picture for clarity.
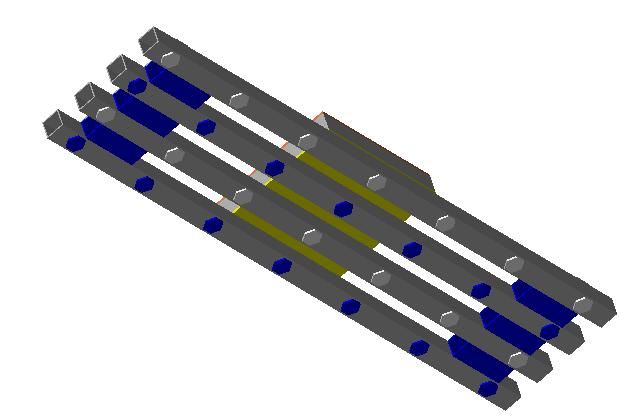
LED Side.
Schematic: How it works or let's be fair - how it should work. 8)
Did some progress on the driver's board. One empty spot for possible future development.
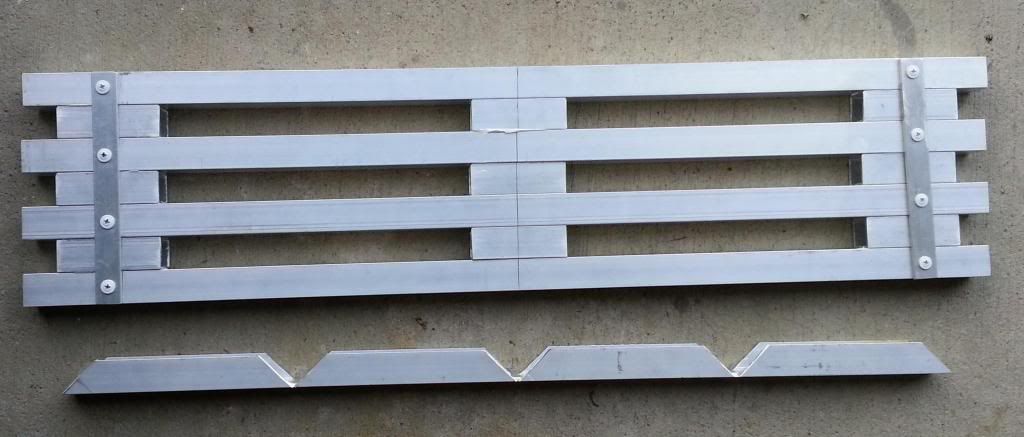
Main tubes glued and reinforced. The "C" channel before bending (to form the collector box).
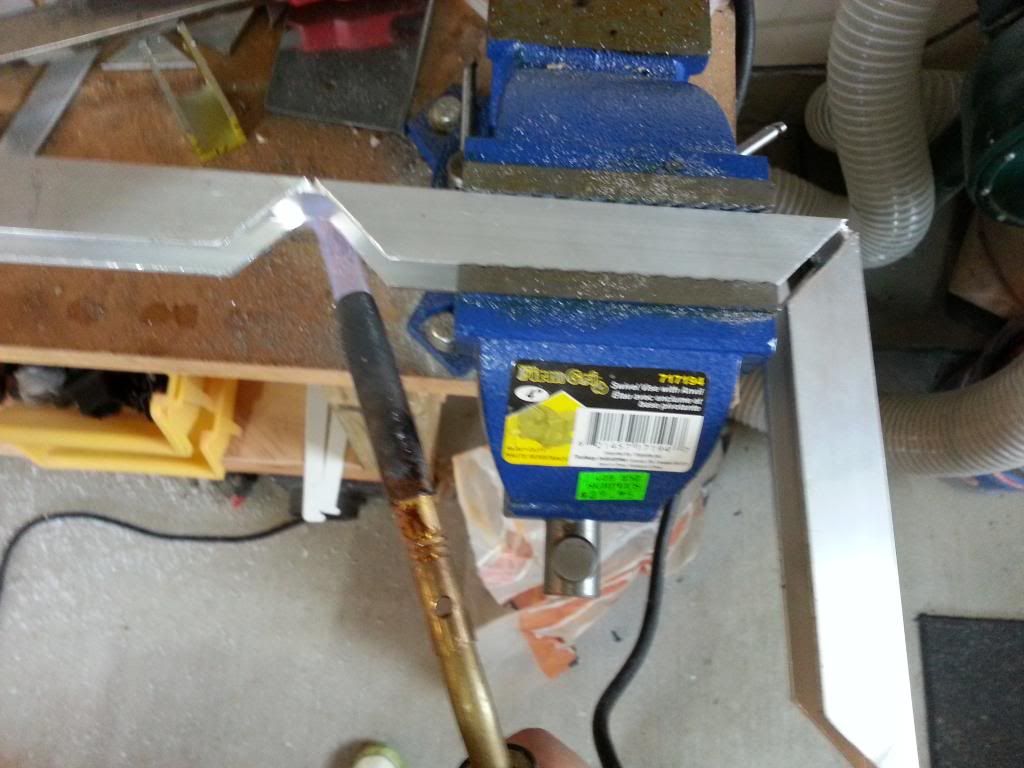
"C" channel during bending operation. Used soldering torch to aid in bending the aluminum alloy.
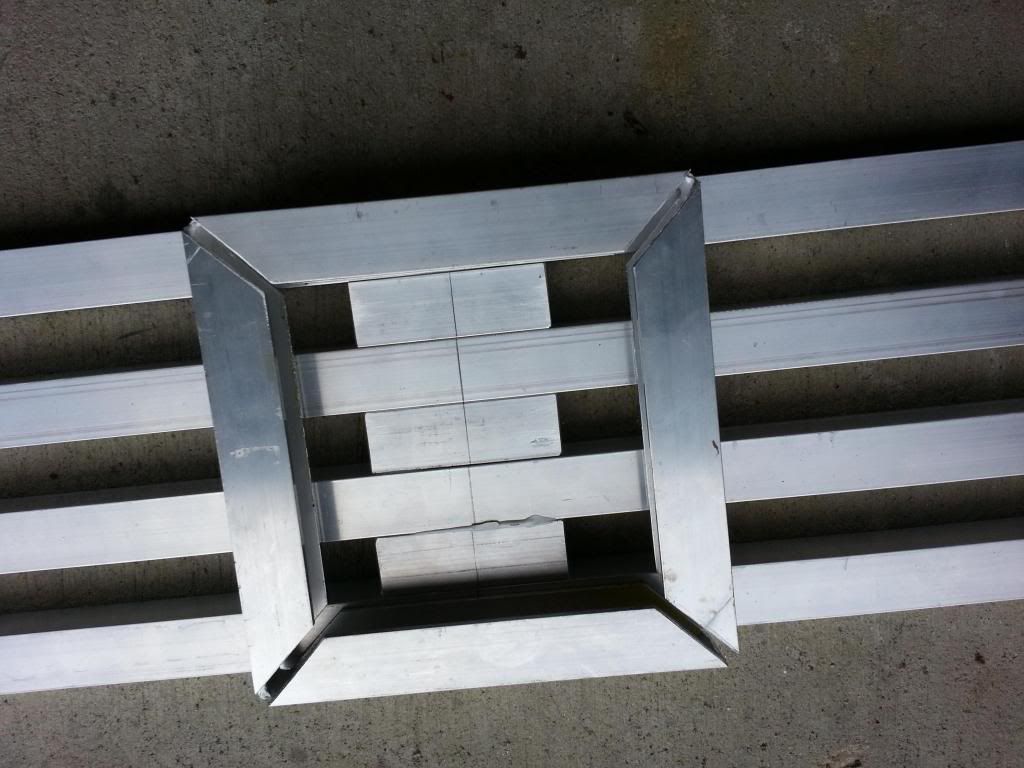
Quick fit up. Part was still hot. I will adjust the size after it cools off.
I will use an exhaust fan to move the air through four square tubes (1x1”, 30" long). The tubes are connected to a collector box, where the fan is pulling the hot air out. There are going to be two fixtures covering more than 60 inches in length.
Materials for each fixture:
- Long tubes: aluminum square tube 1x1”, 0.096” wall thickness, 30” long, 4 pcs.
- Short spacers: aluminum square tube 1x1”, 0.096” wall thickness, 3” long, 9 pcs.
- Box: 1/8 aluminum plate, 1/8 1x1” channel.
- the parts are going to be glued with thermal paste and reinforced with metal screws.
- LED's will be secured with bolts. I will use thermal compound Artic Silver 5.
- 14 Royal Blue LED’s.
- 14 White Cool LED’s.
- 4 or 5 UV LED’s.
- 1 or 2 Red, 1 or 2 Green LED’s.
- 3 Mean Well ELN-60-48P dimmable drivers.
- 4 lunar LED's + driver.
- fan: 3.5” dia, 12V DC
Fan side. Fan not shown in picture for clarity.

LED Side.

Schematic: How it works or let's be fair - how it should work. 8)

Did some progress on the driver's board. One empty spot for possible future development.

Main tubes glued and reinforced. The "C" channel before bending (to form the collector box).

"C" channel during bending operation. Used soldering torch to aid in bending the aluminum alloy.

Quick fit up. Part was still hot. I will adjust the size after it cools off.


