Victoss' 120 Build

Victoss

Member
Joined
Aug 6, 2012
Location
Kitchener ON
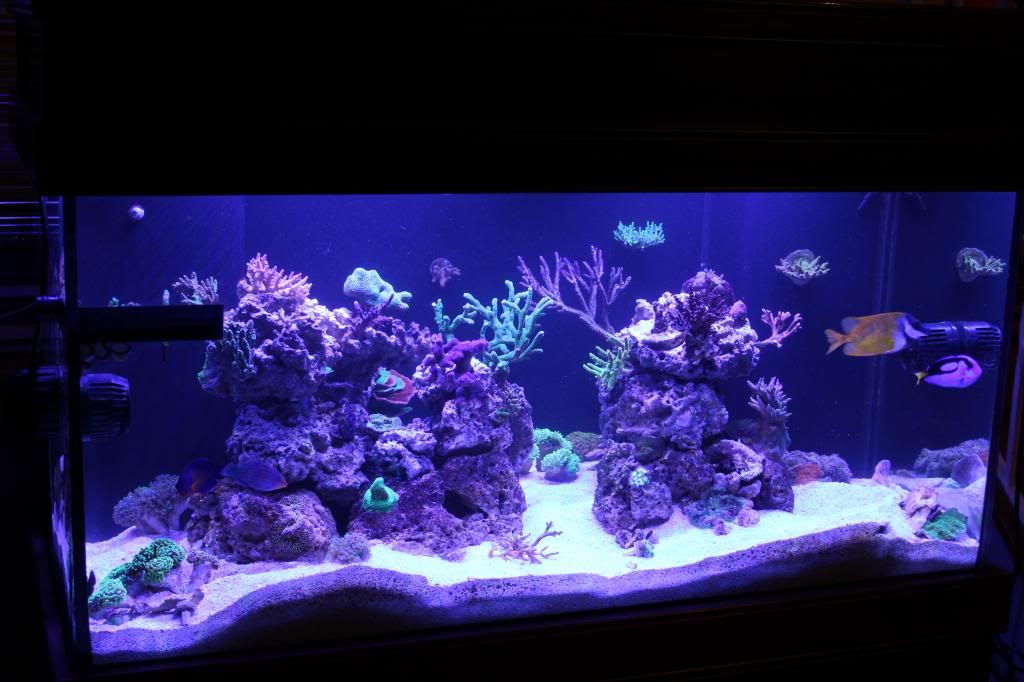
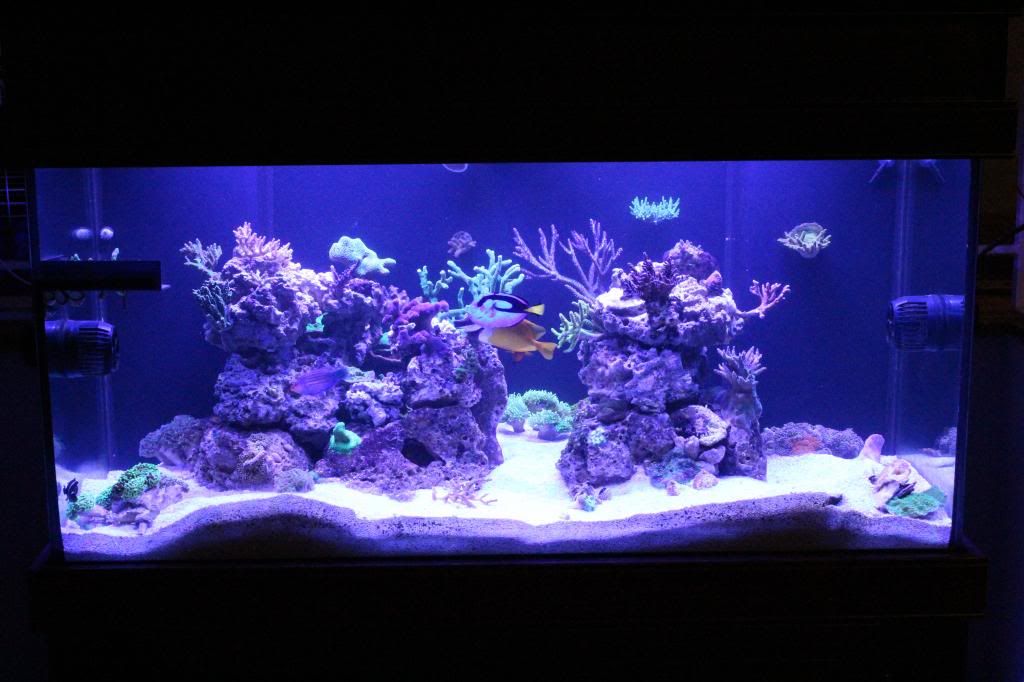
I'm stepping up from my 50 gallon sumpless tank to a 120 with dual corner overflows and a custom sump which needs a little fixin and boy do I have a LOT of questions. :)

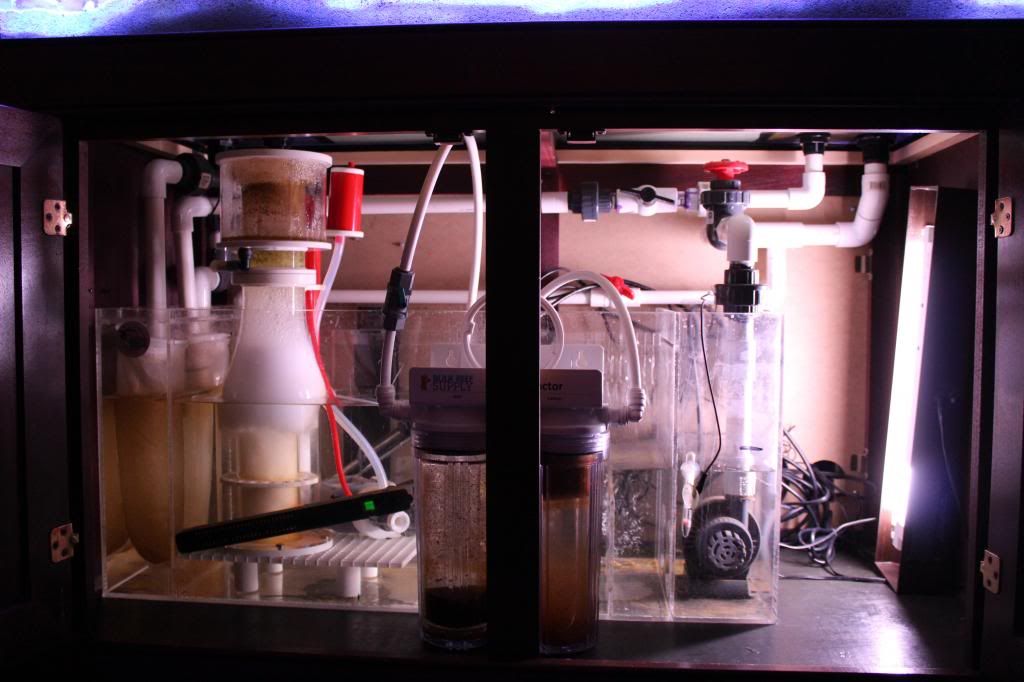
I guess I should start off with my sump, It's a custom made sump I got from Parksy which has a hole drilled but there is a crack by the hole. I'm planning on using some Weldon to cement a piece of Acrylic on top of the hole so that's no problem. What I'm looking for information on is the design and layout of this sump. It has a very long section along the back (front in the picture) which I believe Parksy said he used to grow mangroves in, I'll probably use it a some kind of refugium too.

My plan is to have water flow in (blue arrows) to the square section bottom right in picture, which then flows through the red slot partway up from the bottom. This will flow through the refugium section over the orange overflow teeth back into the main chamber.

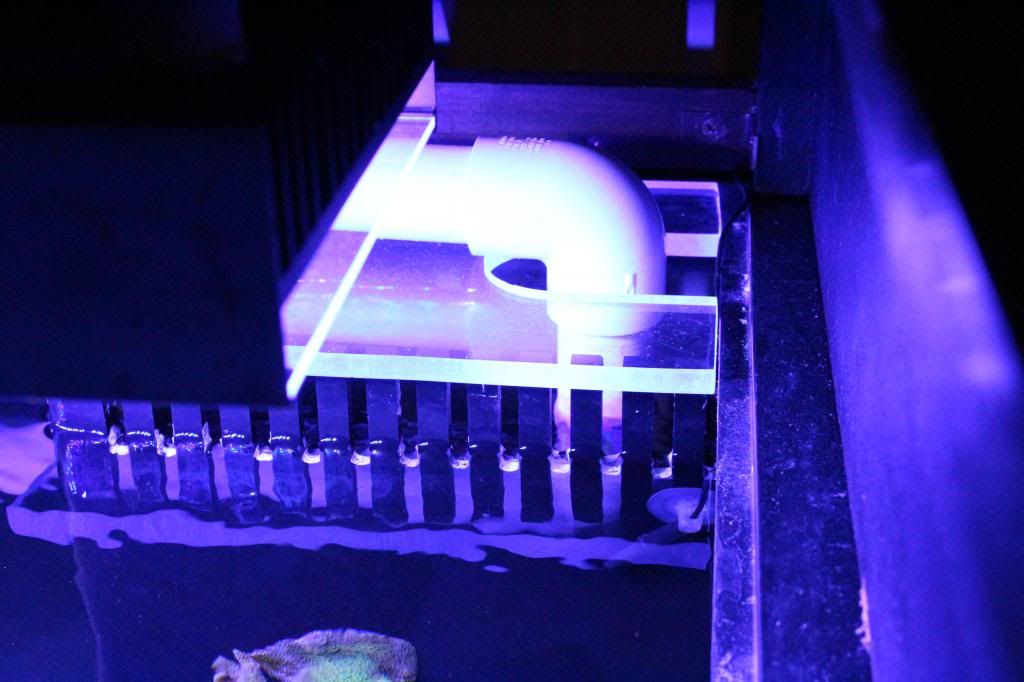
The other blue arrow flows into chamber 1 which has teeth at the very bottom of the sump to big section 2 (green) where it meets up with the refugium overflow and then through the big holes to the return chamber. In the middle chamber I'm planning on putting a baffle to keep the water a consistent height for the skimmer and the heaters will be here too (black dotted line). The hard to see purple slots I believe are for if a section overflows?

Does this look about right? My only worry is the section after the baffle is going to be so small that there is almost no point to it (see picture 2), plus there already is a small baffle with 2 big holes in it which was probably used for sponges/filtration taking up more space. Maybe I should attach my new baffle directly to this one? The baffle will be 8" high for the skimmers water depth and cemented in with Weldon so not sure how permanent it will be but i'm guessing very :), that's also why I'm a little leery.

ez7c.jpg

sfi4.jpg


This is what I'm thinking for the plumbing being that it's a dual corner overflow, the dark grey are full siphons and it's set up as a herbi overflow but only 1 emergency to 2 full drains. Thoughts?
xqqs.jpg


Thanks in advance ;)
 

Neopimp

Website Doctor
Staff member
Website Admin
Joined
Jun 9, 2014
Location
Sarnia
A herbie has no emerg drain.  It uses the emerg to trickle a small amount of water down.  :)


I mysel run 2 full siphon pipes and 1 trickle on my tank.
 

Victoss

Member
Joined
Aug 6, 2012
Location
Kitchener ON
Neopimp link said:
A herbie has no emerg drain.  It uses the emerg to trickle a small amount of water down.  :)

From what I read there should be no trickle if it's balanced right and maintained otherwise there is a risk of the emergency clogging but that seems to be a big debate. My only worry right now is if I'm safe enough with 1 emergency but I can't see both siphons failing at the same time (of course there is always a what if). Also I don't know if I can get away with having the water balance with a 1/2" or so fall from the overflows weir in both overflows. I guess it's mostly a balancing act.
 

Neopimp

Website Doctor
Staff member
Website Admin
Joined
Jun 9, 2014
Location
Sarnia
Good luck balancing with just siphons.  Although not impossible it's going to be hard.  Runnin that emerg with a small trickle through removes the fluctuations in the system. 
 

Victoss

Member
Joined
Aug 6, 2012
Location
Kitchener ON
I guess I should mention I have a Water Blaster 5000W with about 4' 4" head.

I'm not 100% sure what size bulkheads fit what but I have a 1.75" and 1.5"  hole in each overflow. I'm guessing 1" and 3/4" bulkheads? Do bulkhead sizes relate directly to pvc sizes? Also I'm planning on having the tank side of the bulkhead to be threaded so I can adjust the drains but should the outside of the bulkhead be slip or thread?

The bigger holes will be the return and emergency while the smaller are the 2 siphons. This seem right?
 

davesolo29

Super Active Member
Joined
Feb 15, 2012
Location
Kitchener, Ontario
having dual overflows and drains is very hard to balance.  you will find that one will do all the work and the other will be extremely noisy and gurgle all the time.

i hated it.
 

Victoss

Member
Joined
Aug 6, 2012
Location
Kitchener ON
If i'm correct in my random internet searching (which I have no idea if i'm right) a 3/4" pipe has about 660GPH
http://flexpvc.com/WaterFlowBasedOnPipeSize.shtml
and the WB5000 can do about ~700GPH with 4'4" head?
http://premiumaquatics.com/prodimages/coralvue/WB5000-chart.jpg

So with the 2 drains at 1320GPH combined they will definitely be turned down to almost half giving me some room to dial them both to match the return and the siphon will be 6" below the water line to ensure the siphon will always start and not suck air.
 

Victoss

Member
Joined
Aug 6, 2012
Location
Kitchener ON
So finished up my plumbing earlier in the week and tested somewhat by filling the overflows with the return and letting that run for a few hours, all good except for a single drip on a thread to the gave valve but it's ok since it's above the sump (made sure all valves and unions were above sump). I can remove it because of a nearby union so i'll have to add some extra tape on that this weekend. Sorry no pics, the only one I have right now is a really crappy phone pic and I'm pretty sure I can see bigfoot in it.  :)

There is a few more touches on the stand like adding a back wall and figuring out the cords/electronics, might add a shelf for that. Bought an American DJ power bar with the 8 switches and also may run a dedicated circuit to the tank.

I'm thinking for the transfer I move all from the 50 gal one day then week after do the 20 gal which I plan on shutting down too.

One problem is my current lights will be out of commission for one day while I add more LEDs to them so I'll have to make a temporary switch to my old 2 x 150W MH and maybe even the 250W MH I have.
 

Victoss

Member
Joined
Aug 6, 2012
Location
Kitchener ON
Picture of the sump and plumbing  :)

devp.jpg


I decided to fill with rodi water first, mix the salt and then add sand in last. So that long process will be starting soon. (will leave room for 40g or so from old tank)

Still not sure but i'm thinking a one day move with the 50g would be best and then down the road just move the rock and few corals from the 20g.
 

Victoss

Member
Joined
Aug 6, 2012
Location
Kitchener ON
Everything was moved from the 50 gal to my new 120 last weekend (sorry no pic yet), sunday I will be moving the little bit of rock from my 20 gal over too.

Last week I also accomplished upgrading my LEDs so if you haven't yet you can check that out over here in the DIY section: http://www.thefragtank.ca/forum/index.php?topic=7541.0

Just finished all my wiring in behind the sump today (sat) which is mounted on a wooden panel with magnets that attache to the stand. On the left is a American DJ switched power bar so I can turn everything on and off separately. The return, skimmer, ATO and heaters are on this. Middle is all my drivers for LEDs and the little silver box in the bottom right is 4 relay controlled outlets so I can set timers, delays and such from my controller.

IMG_8184_zps11059261.jpg
 

Victoss

Member
Joined
Aug 6, 2012
Location
Kitchener ON
Well what a night  :mad:
Mostly due to my stupidity...

Long story short I accidentally flooded the stand when I forgot to put the line to the refugium back in the sump after cleaning it. The floor around the tank started to puddle a little and I cleaned it all up. After putting all the equipment back in the tank and lastly the grounding probe I got a little shock. All equipment was off but I decided to hit the test button on the gfci ensuring that everything was fully off, still got a shock. When tested on dry floor vs semi-wet carpet I got no shock so it had to be something externally on the floor.

Knowing there is a phone jack right on the floor behind the tank I assume that is the problem, I remove the red wire from the main phone line and test the waters voltage, was getting above 30 VDC before, now I'm getting 0V and no shock. I vaguely remember there being a nick on that line so I think I found my culprit.

Now the bigger problem is I'm pretty sure phones need both the green and red wire to operate, then why do all my phones still work??? Also I know it's not a second line because both the yellow and black wires are disconnected.

I'll be sure to post some pictures of the tank tomorrow finally.
 

unibob

Distinguished Member
Website Affiliate
Joined
Mar 15, 2012
Location
St Thomas
Is there a phone plugged into this jack? If not, as long as everything is home ran back to demark it won't affect your phones at all.

Tbh, phone jacks are old school. It's now people are just buying a base unit, then have just the plug in stations throughout house. Having a hard wired no power required phone on hand for power outages/emergency.
 

jroovers

Super Active Member
Joined
Aug 29, 2012
Location
London
Thinks are looking nice, sorry to hear about your small flood, your electrical and sump all look nice and neat.  Will be following to see your pics and how you progress.
 

Victoss

Member
Joined
Aug 6, 2012
Location
Kitchener ON
This is where I get confused, my demarc is wired to a splitter (red, green in) where it has 4 wires out, 2 for modem which is run directly to the modems phone jack and 2 which goes to a second demarc that splits to the phones throughout the house. It was the red wire that comes from the splitter to this second demarc point that I disconnected but all my phones still work. I'm thinking the other line to the modem must be crossed with the phones line. I'll have to test when I get home.
 

Victoss

Member
Joined
Aug 6, 2012
Location
Kitchener ON
Now that every things dried up my internet was down when I got home so the 2 must be mixed up somewhere down the line and it must of been shorting across 2 wires. Plugged the red line back in for now, I'll have to be aware of that next time I get the floor wet until I manage to remove that line.

Anyways here are them pictures I promised!  :)

IMG_8219_zpsc05cf7a3.jpg


IMG_8230_zps8d945808.jpg


IMG_8198_zps4f10acfb.jpg


*Waters a lot lower then where I want it in the sump but because of the spill on sunday I'll have mix up some more.

Here I had to cut and place some acrylic over the overflows to keep snails and would be jumpers out. I was going to get around to it next weekend but a snail decided that wasn't soon enough so last week he decided to get him self stuck in one of the siphon drains, as planned though my emergency drain handled the excess flow. He got stuck right at a union where there is a tinny lip in the pipe and I had to pulverize the snail to get him out.

IMG_8236_zpse9ddb86f.jpg


IMG_8237_zps9e98b0fb.jpg


My goby and maroon clownfish have been moving the sand around so that's why it looks like dunes everywhere.  :(

Next step is to rig up the float switches for the ATO so I can stop adding it by the cupfuls everyday.  :D
 

Duke

Distinguished Member
Website Affiliate
Joined
Sep 20, 2011
wow, looks amazing, talk about off to a good start!!. ive seen this tank and stand, very professional looking, i bet it looks great in your home.
 

Victoss

Member
Joined
Aug 6, 2012
Location
Kitchener ON
Thanks, it definitely looks a lot nicer then the old tank. I'll have to try and get a good picture with the stand, all my photos I took today ended up making the stand look pitch black, too much light in the tank. ;D
 
Top