Teebone's Epic 210G SPS Build

teebone110

Distinguished Member
Joined
Jan 5, 2011
Location
London, Ontario
Website
www.thefragtank.ca
Salty Cracker link said:
2-2x6's are good if you used pl-adhesive and screws to laminate them together.  Remember they're really only 1.75x5.5\" (still not sure where they got away with making lumber smaller than it's supposed size).

Lol, of course I didn't use any adhesive, but I did think that driving a lot of screws into the boards would be enough to prevent it from twisting, etc.

I did read about different ways to laminate them together, but thought the screws would be enough. At least its not too late and it can still be done

And about wood sizes, I still don't really get it, the lengths aren't accurate either  ???
 

Duke

Distinguished Member
Website Affiliate
Joined
Sep 20, 2011
wood is measured in uncut rough wood sizes.. so a 2x6 is actually cut from a 2"x 6" board. thats how i understood it at least. That stand is looking really good, this build is going to be insane!!
 

Giglio324

Member
Joined
Oct 17, 2012
Location
Windsor, Ontario
teebone110 link said:
[quote author=Salty Cracker link=topic=8304.msg90394#msg90394 date=1397604470]
2-2x6's are good if you used pl-adhesive and screws to laminate them together.  Remember they're really only 1.75x5.5\" (still not sure where they got away with making lumber smaller than it's supposed size).

Lol, of course I didn't use any adhesive, but I did think that driving a lot of screws into the boards would be enough to prevent it from twisting, etc.

I did read about different ways to laminate them together, but thought the screws would be enough. At least its not too late and it can still be done

And about wood sizes, I still don't really get it, the lengths aren't accurate either  ???
[/quote]
there are 2 kinds of 8 foot 2x4's (1.5x3.5) you have 96" ones or the actual 8 ft and you have i think 92 5/8 which are for framing if im not mistaken
 

teebone110

Distinguished Member
Joined
Jan 5, 2011
Location
London, Ontario
Website
www.thefragtank.ca
Duke link said:
wood is measured in uncut rough wood sizes.. so a 2x6 is actually cut from a 2\"x 6\" board. thats how i understood it at least. That stand is looking really good, this build is going to be insane!!

I am not sure how they figure it out, but I know that older houses have actual 2x4s and 2x6s, etc.
Thanks, I hope not to disappoint  :)

Giglio324 link said:
there are 2 kinds of 8 foot 2x4's (1.5x3.5) you have 96\" ones or the actual 8 ft and you have i think 92 5/8 which are for framing if im not mistaken

To make matters more confusing, I think they had a top grade 2x4 and stud grade 2x4, I just thought it meant the quality of the wood and 10 cents less expensive.
 

teebone110

Distinguished Member
Joined
Jan 5, 2011
Location
London, Ontario
Website
www.thefragtank.ca
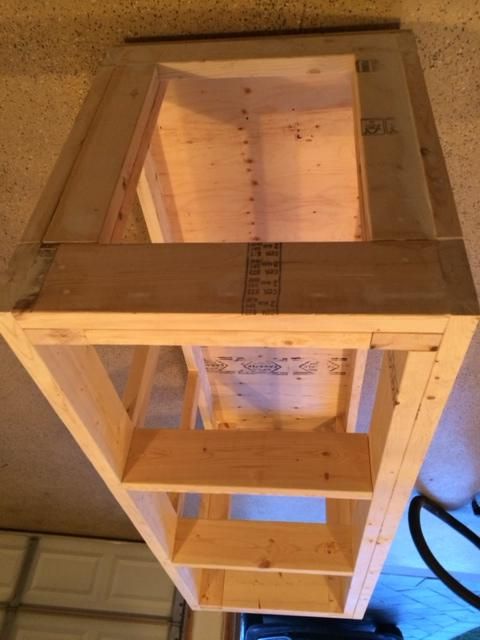
I have had another thought about increasing the height within the sump area under the stand. An easy mod can be made with the supports in the middle of the bottom frame (see the picture for reference)…


Option #1 - turn the two 2x4 supports on the bottom on their side = +1.5" of height space.

Option #2 - remove the two 2x4 supports on the bottom = +3" height space (I would attach 5/8" plywood to strengthen the bottom frame)

Option #3 - leave as is, with about 28" height space

Lol, at least 5/8" plywood is actually 5/8" - at least I think it is ::)
 

Petercar (RIP Dec 2017)

Distinguished Member
Donor
Joined
Aug 29, 2011
Location
Sarnia, Ontario
what about taking the bottom braces out and use a open bottom ..and then lay down a plastic amd staple it to sides amd yu can still lay styro foam orlywood on top on yur floor amd then yu have that extra depth ..i wish i can cut out my stand floor then i got that extra depth of space onside the stand.  just lay down plastic sheet ..the other reason that is good is yu can clean up spills or water that made its way under
 

AdamS

Active Member
Joined
Oct 7, 2012
Location
London, Ontario
I kind of agree with petercar. My stand is very similar to yours and I never know if water has gotten underneath

One other suggestion, make sure you dont skin it tight. I did this and had to add fans to the back to move air cause i was getting mold. Now i have to change the fans every 6 months cause they are caked in crap. Of course everyone else prolly already knows this, but I thought i would put it out there.

Duke is right about lumber sizes

Wikipedia says "Historically, the nominal dimensions were the size of the green (not dried), rough (unfinished) boards that eventually became smaller finished lumber through drying and planing (to smooth the wood). Today, the standards specify the final finished dimensions and the mill cuts the logs to whatever size it needs to achieve those final dimensions. "

http://en.m.wikipedia.org/wiki/Lumber
 

Giglio324

Member
Joined
Oct 17, 2012
Location
Windsor, Ontario
If you take out the two centre supports in the bottom and put a sheet of 5/8 I would seal it with some kind of membrane then if it leaks it stays within I mean god forbid but always kinda plan for worst case ontario
 

teebone110

Distinguished Member
Joined
Jan 5, 2011
Location
London, Ontario
Website
www.thefragtank.ca
Petercar link said:
what about taking the bottom braces out and use a open bottom ..and then lay down a plastic amd staple it to sides amd yu can still lay styro foam orlywood on top on yur floor amd then yu have that extra depth ..i wish i can cut out my stand floor then i got that extra depth of space onside the stand.  just lay down plastic sheet ..the other reason that is good is yu can clean up spills or water that made its way under

Good suggestion… I was contemplating doing something like that by removing the inside bottom braces and attaching plywood to the bottom of the frame. Then I was thinking about using a silicone around the joints and sealing it. I have read that some guys get pvc liners for the bottom of their stands too.

AdamS link said:
I kind of agree with petercar. My stand is very similar to yours and I never know if water has gotten underneath

One other suggestion, make sure you dont skin it tight. I did this and had to add fans to the back to move air cause i was getting mold. Now i have to change the fans every 6 months cause they are caked in crap. Of course everyone else prolly already knows this, but I thought i would put it out there.

Great point… I made that same mistake with my current tank as I originally had the inside of the stand sealed and insulated with styrofoam  ::) , and had the same issues with mold and high humidity levels. With this design I was planning on keeping the middle section of the back open for those reasons.

Giglio324 link said:
If you take out the two centre supports in the bottom and put a sheet of 5/8 I would seal it with some kind of membrane then if it leaks it stays within I mean god forbid but always kinda plan for worst case ontario

I think we have a plan, I like it.
 

curiousphil

Super Active Member
Joined
Apr 15, 2013
Location
London, Ontario
Looks like a great start Tyler!  I also like the plan to remove the bottom support braces.  Like Adam, my stand is also constructed the same way, with a plywood skin on top of the supports.... and I know that I've had water get under there that I've been unable to properly clean up.

If you put 5/8 plywood under the frame you could seal the whole inside of the cabinet with waterproof paint like people who build plywood sumps.  Would look classier than having a plastic sheet in there but provide the same amount of safety and be easy to clean up spills with a shop vac and/or towels.
 

deeznutz

Member
Joined
Mar 14, 2014
Location
Newmarket, Ontario
I would remove the bottom cross braces and add 3/4 ply bottom for strength.

Then urethane the inside with about 3 cost while sanding in between.  Be liberal in the corners and joints etc.  This will give you a smooth water proof finish.

This worked very well for me in the past.

-dan
 

teebone110

Distinguished Member
Joined
Jan 5, 2011
Location
London, Ontario
Website
www.thefragtank.ca
As unanimously recommended I pulled out the bottom center braces, attached 5/8" plywood and sealed all joints with a paintable silicone. This instantly gives me an additional 3 inches of height, which translates to 30.5" inside the stand. I should be good to go with most skimmers or anything else I need to squeeze into the area.

Here is an updated pic….


deeznutz link said:
I would remove the bottom cross braces and add 3/4 ply bottom for strength.

Then urethane the inside with about 3 cost while sanding in between.  Be liberal in the corners and joints etc.  This will give you a smooth water proof finish.

This worked very well for me in the past.

-dan

Hey Dan, Thanks for your suggestions, but its too late now for the 3/4" plywood  ;D. I was contemplating going with thicker board, but am hoping 5/8" should be alright. I also have some Kilz primer that I will be using to prep the surface after the silicone dries. Multiple coats of urethane sounds like a good plan too!I will have to check if this primer is compatible before I get into the next step of painting.

curiousphil link said:
Looks like a great start Tyler!  I also like the plan to remove the bottom support braces.  Like Adam, my stand is also constructed the same way, with a plywood skin on top of the supports.... and I know that I've had water get under there that I've been unable to properly clean up.

If you put 5/8 plywood under the frame you could seal the whole inside of the cabinet with waterproof paint like people who build plywood sumps.  Would look classier than having a plastic sheet in there but provide the same amount of safety and be easy to clean up spills with a shop vac and/or towels.

I like what your saying, thanks for the input! 8)
 

deeznutz

Member
Joined
Mar 14, 2014
Location
Newmarket, Ontario
NO worries, 5/8th is fine.  I just prefer the 3/4.  Looks good.
Urethane is completely water proof.  I would have skipped the silicone all together. 

Why did you fill all the joint and screws?  Are you not skinning it?
 

teebone110

Distinguished Member
Joined
Jan 5, 2011
Location
London, Ontario
Website
www.thefragtank.ca
deeznutz link said:
NO worries, 5/8th is fine.  I just prefer the 3/4.  Looks good.
Urethane is completely water proof.  I would have skipped the silicone all together. 

Why did you fill all the joint and screws?  Are you not skinning it?


Lol!  I wondered when someone would ask me about that..  I just like making extra work for myself and it gives it a more finished look before it gets skinned… My thoughts were that it would also help prevent any corrosion from the many screws I have driven into this thing!

I am going to be skinning it and and trying to decide what type of wood I should use, although I picked out a nice design/style from another build on reef central. I will post some pics when I get a chance.
 

AdInfinitum

Super Active Member
Joined
Jan 12, 2012
Location
Thorndale, Ontario
Petercar link said:
if yu want that futurist look id skin it with  black acrylic ...use some kind of buffer on tops amd bottom and corners amd just slide the panels in

My Tenecor acrylic tank came with a translucent white acrylic stand that glows when the light is on inside.  A very Euro-modern look. 

Black acrylic would be a showpiece but a pita to keep the fingerprints and salt stains off constantly.
 

teebone110

Distinguished Member
Joined
Jan 5, 2011
Location
London, Ontario
Website
www.thefragtank.ca
Petercar link said:
if yu want that futurist look id skin it with  black acrylic ...use some kind of buffer on tops amd bottom and corners amd just slide the panels in

Black acrylic would be bad a$$, but my kids would have it constantly covered in fingerprints!
AdInfinitum link said:
[quote author=Petercar link=topic=8304.msg90591#msg90591 date=1397711319]
if yu want that futurist look id skin it with  black acrylic ...use some kind of buffer on tops amd bottom and corners amd just slide the panels in

My Tenecor acrylic tank came with a translucent white acrylic stand that glows when the light is on inside.  A very Euro-modern look. 

Black acrylic would be a showpiece but a pita to keep the fingerprints and salt stains off constantly.
[/quote]

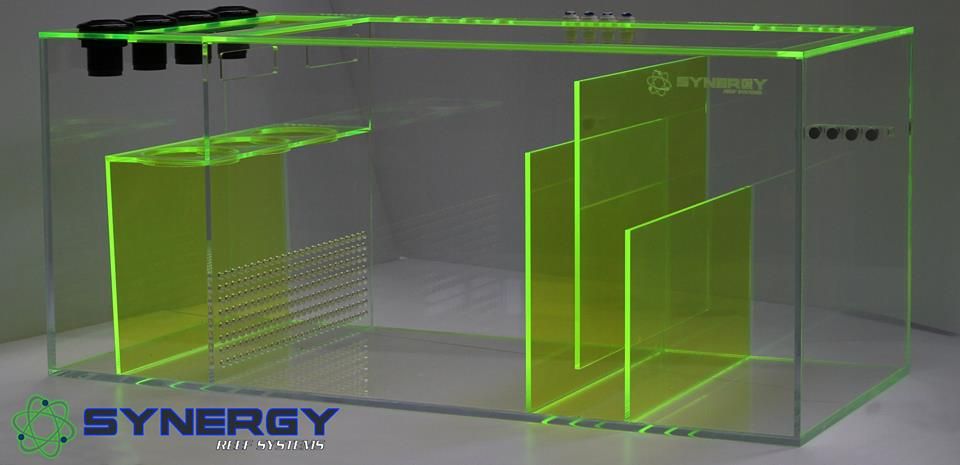
Euro-modern…. that would be an interesting look. I have noticed a trend of some acrylic builders who are now using clear neon and LEDs in their sump creations.


jroovers link said:
Looks like you are making progress!

Thanks Jordan!… slowly, but surely  ;)

Giglio324 link said:
Looks great get the tank on there and water in it

Patience young grasshopper  ;D

MrMiyagi.jpg
 

teebone110

Distinguished Member
Joined
Jan 5, 2011
Location
London, Ontario
Website
www.thefragtank.ca
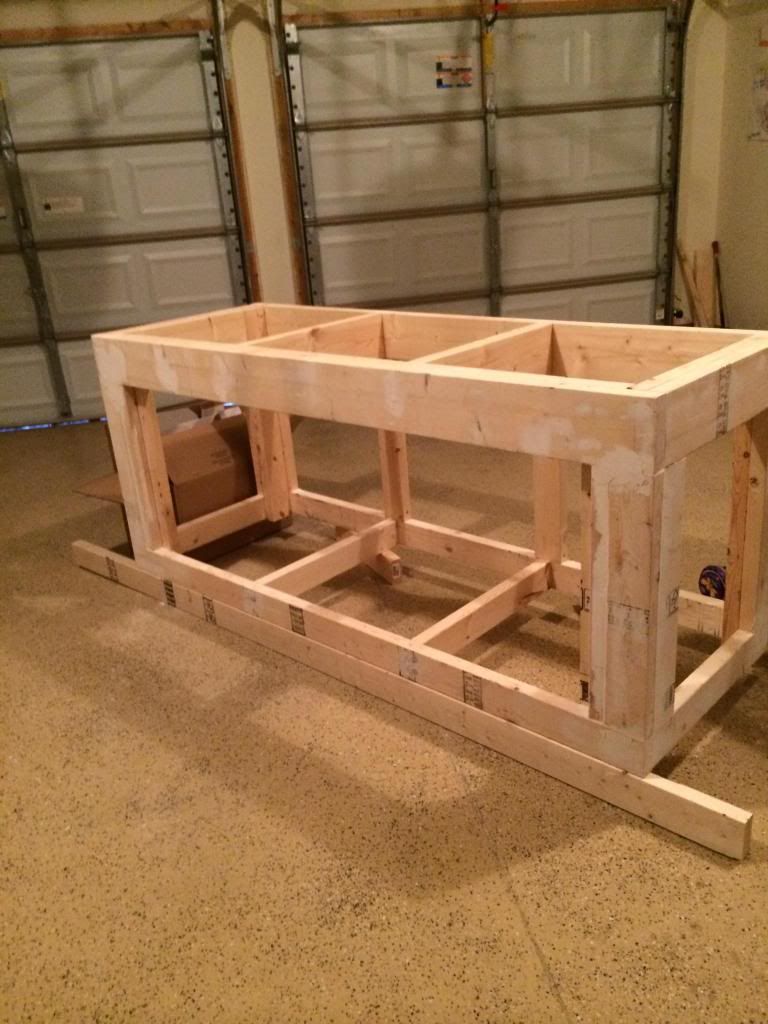
Today I added a white KILZ primer to the stand to give it a "white-washed" look. If you look closely, you can see the inside corners are still bare. The silicone was still not 100% dry, so I will let these areas cure a little longer. Who would of thought we would have hit -8 degrees in April!  Anyways, here is a quick shot….

 
Top