Well I have been talking about getting new lights for the tank, well it finally happened.
I am the kind of person that enjoys electronics, soldering, and generally DIY stuff. That means that LEDs were the only way to go.
Besides the enjoyment of applying long lost school concepts and building something, there are numerous advantages to LEDs.
1. No bulb changes... ever. In fact the LEDs still have 70% of their light output 11 years down the line. Good enough for me.
2. Lower power draw... ROUGHLY half the Watts for equivalent MH output.. Please dont split hairs here and argue")
3. Infinite Combinations and tailored to what you want.. .. Besides the abiity to choose how many of each color you add you can also dim each channel seperately allowing you to change the color to whatever you want. with an RGB set up you could technically get any color under the sun.
Now there are some disadvantages to watch for.
1.Some argue coral growth and such lacks due to lack of certain colors in teh spectrum of most LED fixtures. I cant argue that since I have no experience with that yet. Will keep you posted.
2. The neverending discoteque that can happen when colors are not blending well.
3. The spotlighting that can occur with improper optics and height combinations.
All in all, the pros beat the cons. At least for me
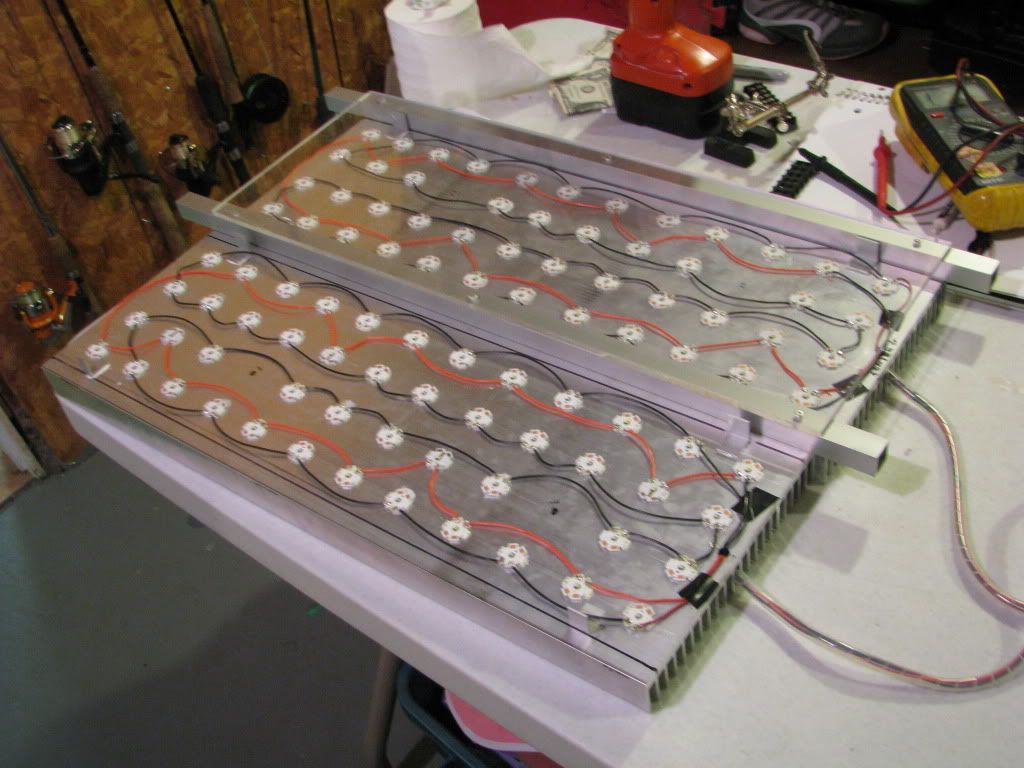
Anyways. The tank I am lighting is a 5' x 18"x24" 120gal glass tank. Nothign terribly special The plan was to use 2 fixtures, one for each half of the tank. I decided to not use optics at all and just mount the fixture lower to the water surface. I did not want to have the fixture 12" above the tank and that they fit into the hood. Plus I am cheap, so it was an easy enough place to cut a corner. That being said, I have the room and the ability to add optics in thte future and to raise the fixture up to 10".
Heres my parts list
Part List:
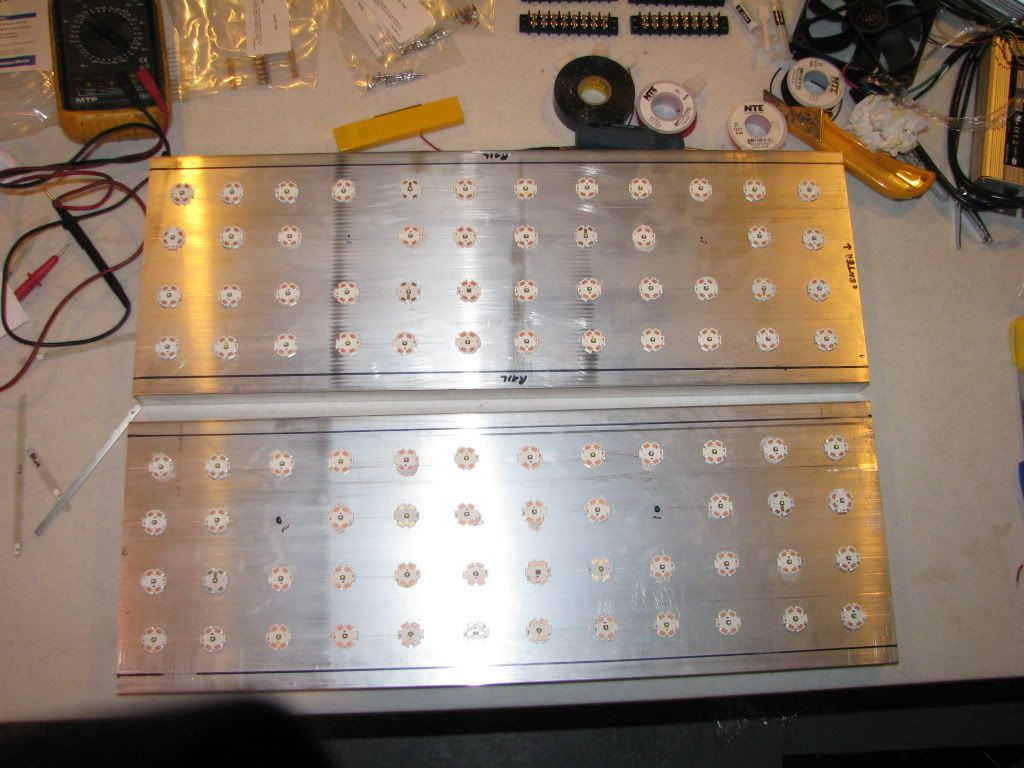
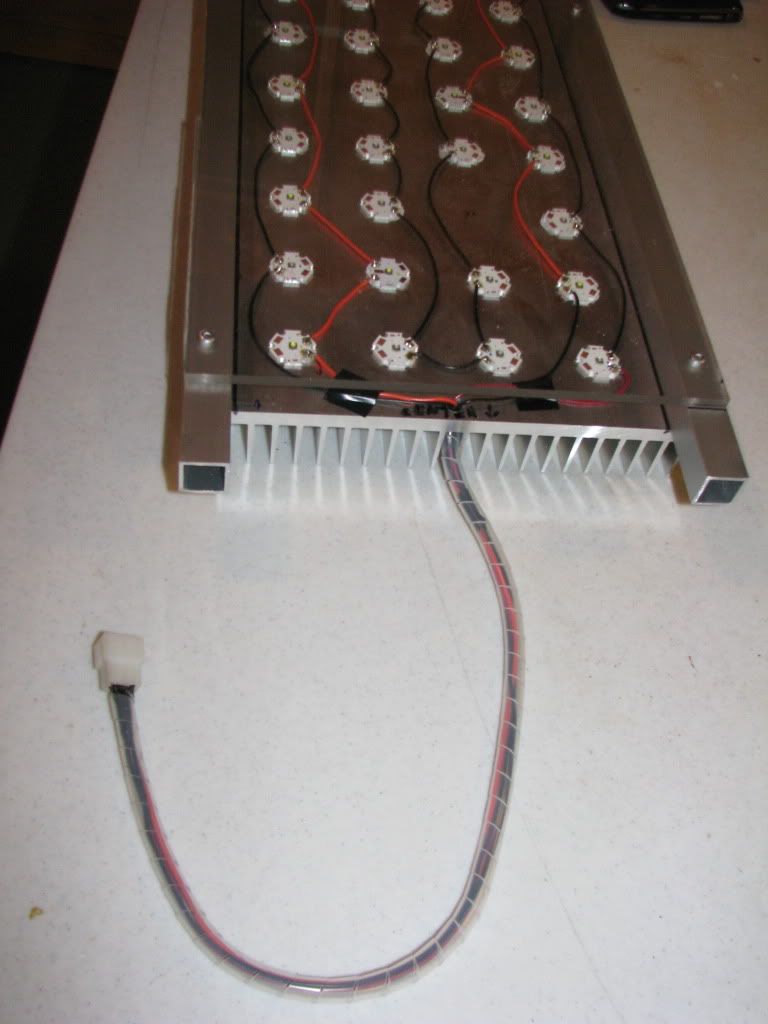
2 x 24" x 8.5" heatsinks from HeatsinkUsa
32 x CREE XP-G Cool White
8 x CREE XP-E Blue
3 x Arctic Alumina Thermal Adhesive 5g
50 x CREE XP-E Royal Blue
2 x CREE XP-E Red
1 x 12V 500mA Power supply for fan
1 x Fan speed controller 4 pin molex to two 3 pin fan
2 x Fan 120mm
2 x 120mm Fan Silencer
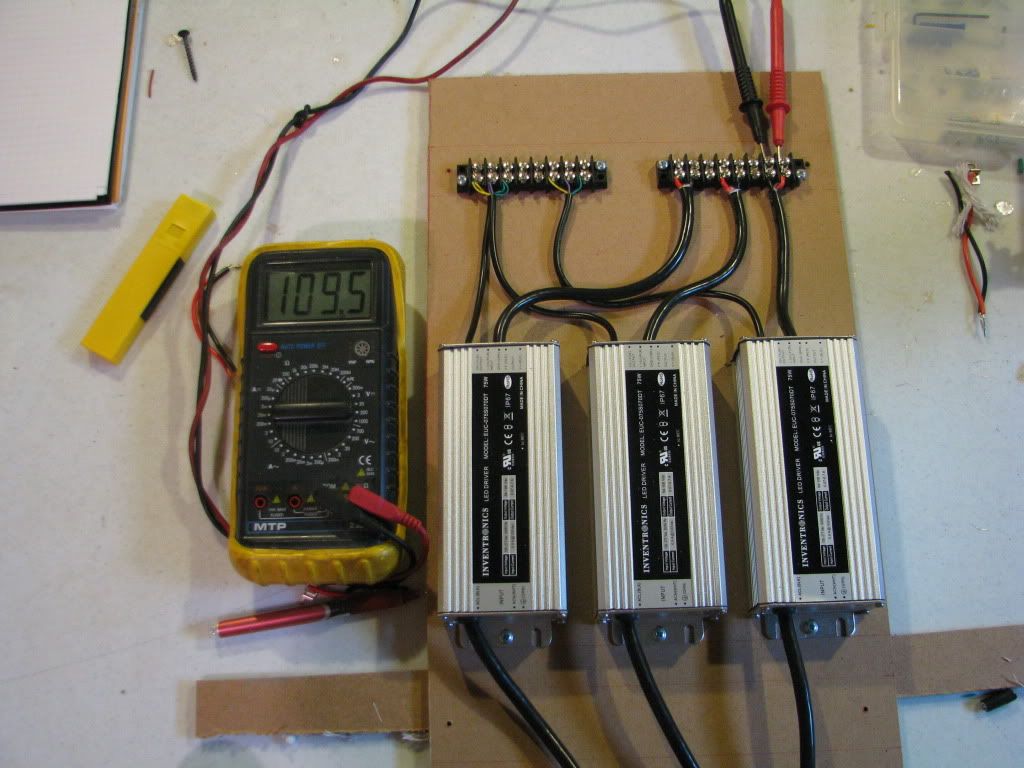
3 x Inventronics 75w driver - 700mA
Random Supplies:
100/140W Soldering Iron (not really needed but my 50W was taking too long)
Terminal Blocks
Terminal Block Jumpers
Various 22AWG Wire
Female MOLEX pins
Male MOLEX Pins
Female MOLEX Plug
Male MOLEX Plug
Spiral Wrap Stuff
Aluminum Angle
Aluminum 3/4" Square Tube
18"x 24" - 1/4" Lexan Sheet
Aluminum Rivets
And some other stuff I am sure I forgot.
The led stuff came from LEDGroupBuy.com (Thanks Milad)
The random electronic stuff was ordered from Newark and the random build supplies was from Home Depot.
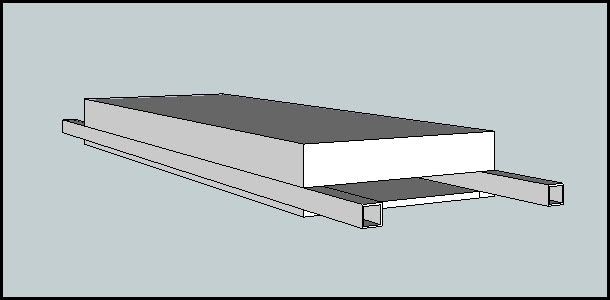
Here are the prototype sketches made:
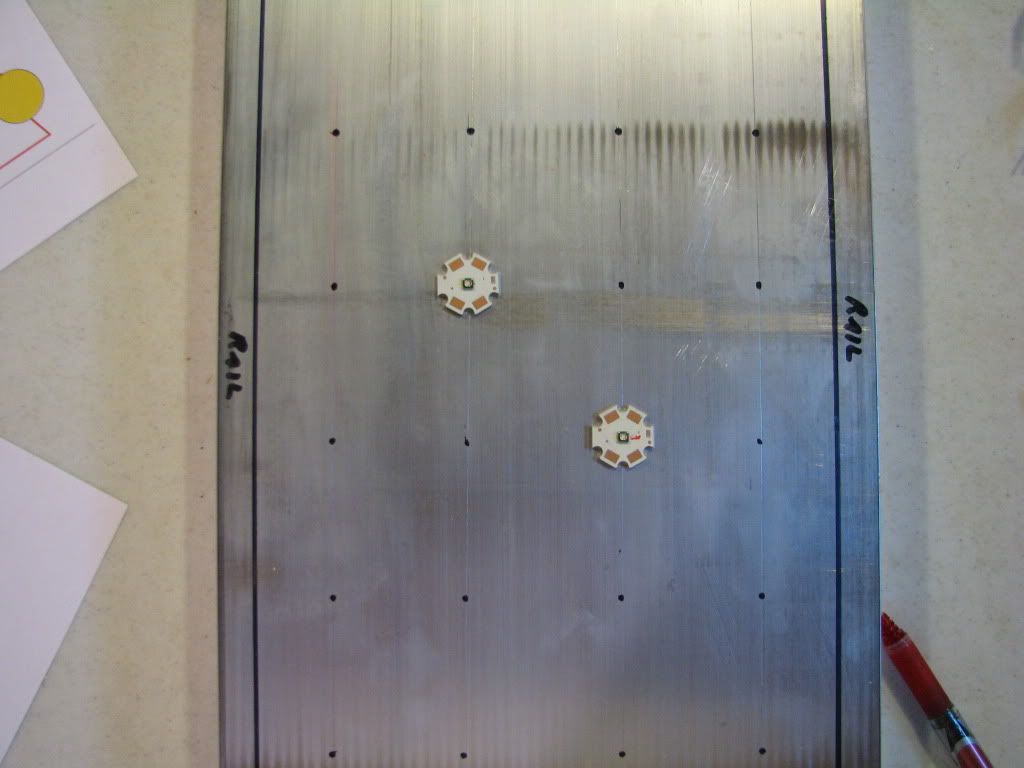
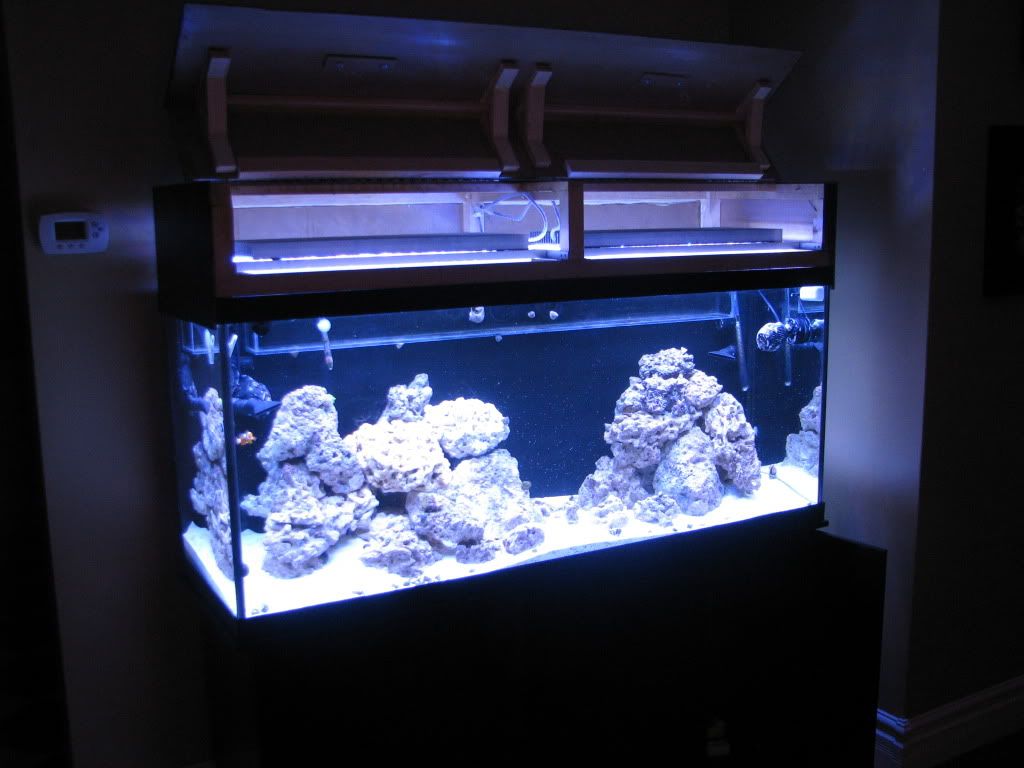
The general concept is illustrated below. The square tube sits on two aluminum angle iron rails mounted to the hood structure. This allows me to slide the fixtures towards the back of the tank when I need to get into it.
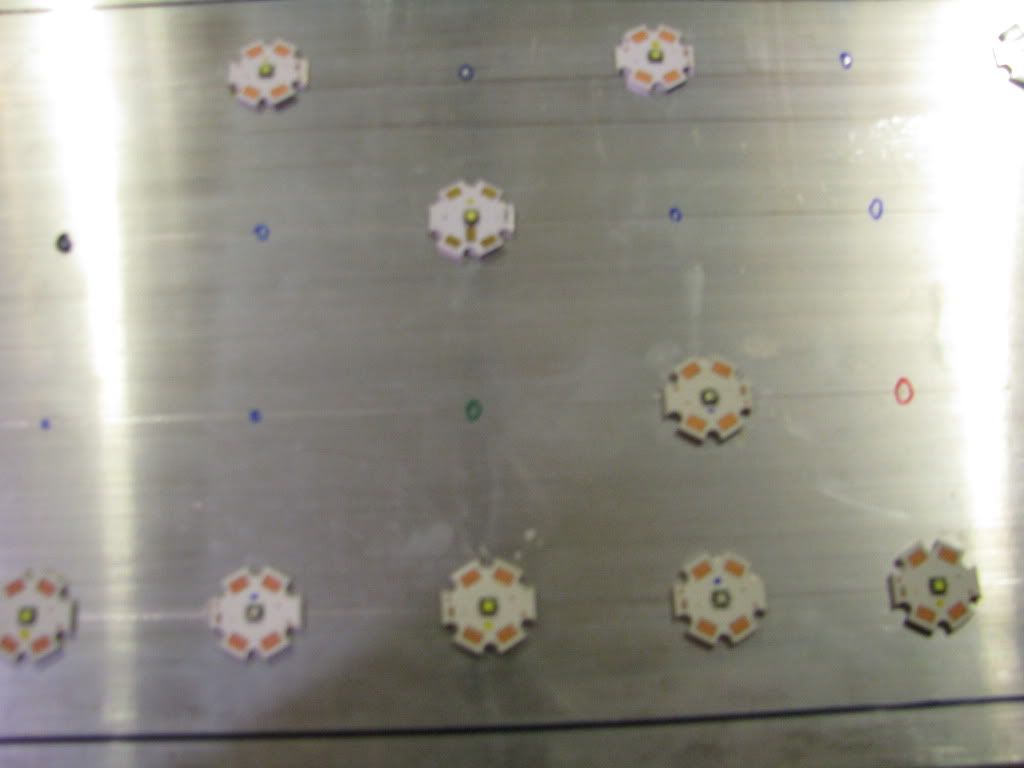
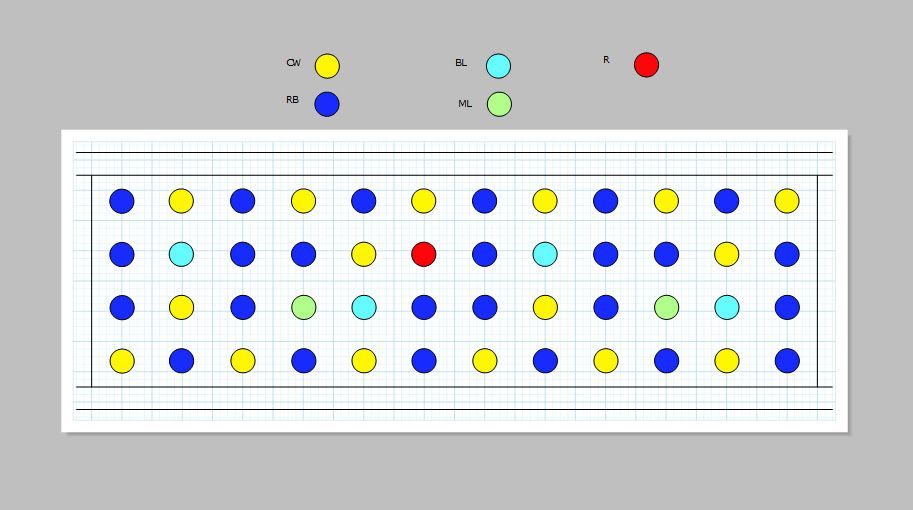
Here is the LED Layout I used in the build. I had a couple Trrue Violets ordered for each fixture but they turned ot to be a scam so I just replaced them with Moon Lighting Leds.
Anyways after waiting a month for my stuff to come into the Depot in Port Huron, I finally got an email saying my stuff had arrived. So I paid the bridge tolls and the depot. I basically saved 150 or more bucks by having it shipped to the states.
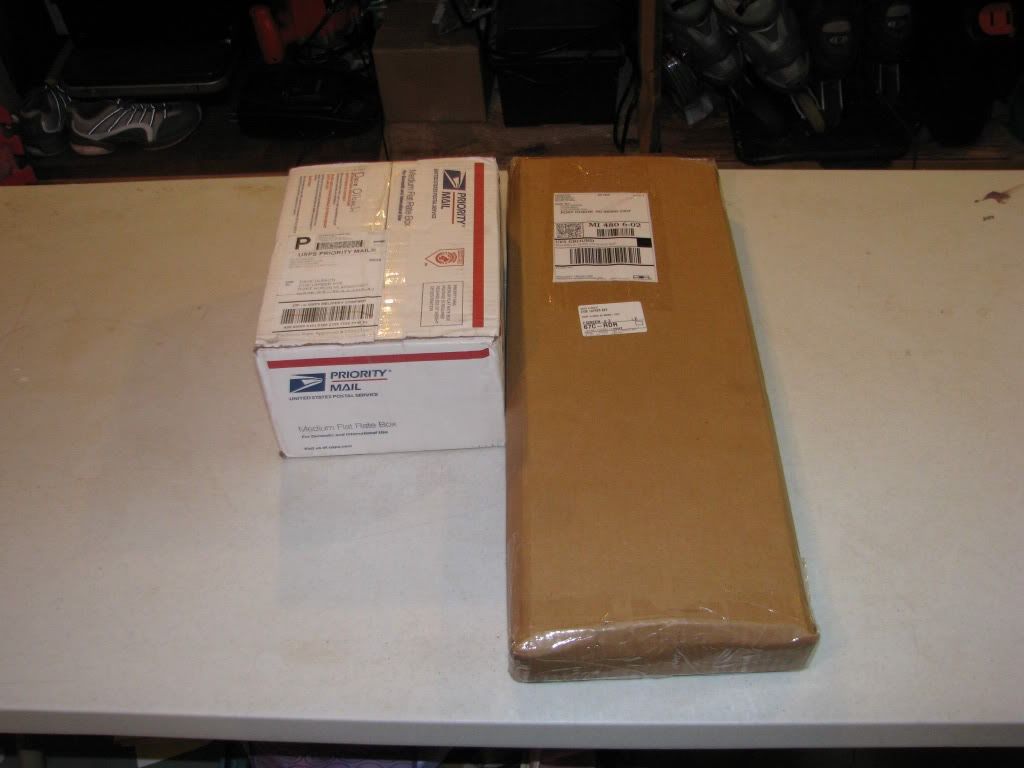
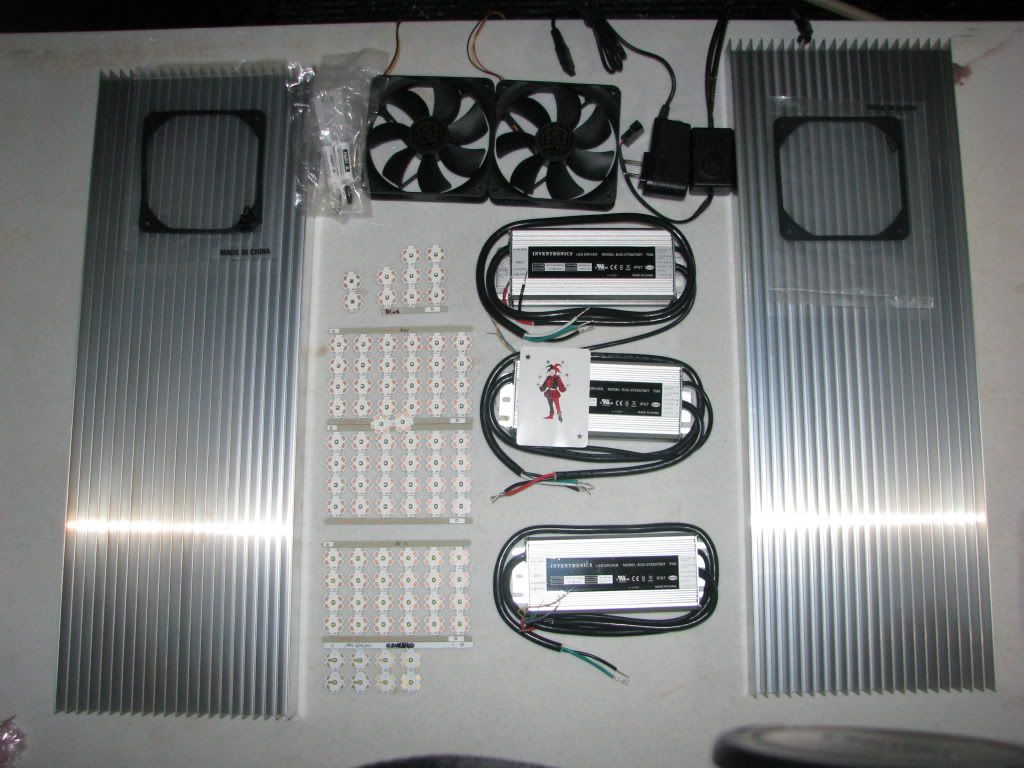
Unpacks to this. I was actually quite surprised how small the stuff was. I am not sure why but I figured everythign would be 1.5x larger Joker card there to illustrate the size.
That is as far as I got on Day one because I was workgin nights and had to go to work.
Stay Tuned.
I am the kind of person that enjoys electronics, soldering, and generally DIY stuff. That means that LEDs were the only way to go.
Besides the enjoyment of applying long lost school concepts and building something, there are numerous advantages to LEDs.
1. No bulb changes... ever. In fact the LEDs still have 70% of their light output 11 years down the line. Good enough for me.
2. Lower power draw... ROUGHLY half the Watts for equivalent MH output.. Please dont split hairs here and argue
3. Infinite Combinations and tailored to what you want.. .. Besides the abiity to choose how many of each color you add you can also dim each channel seperately allowing you to change the color to whatever you want. with an RGB set up you could technically get any color under the sun.
Now there are some disadvantages to watch for.
1.Some argue coral growth and such lacks due to lack of certain colors in teh spectrum of most LED fixtures. I cant argue that since I have no experience with that yet. Will keep you posted.
2. The neverending discoteque that can happen when colors are not blending well.
3. The spotlighting that can occur with improper optics and height combinations.
All in all, the pros beat the cons. At least for me
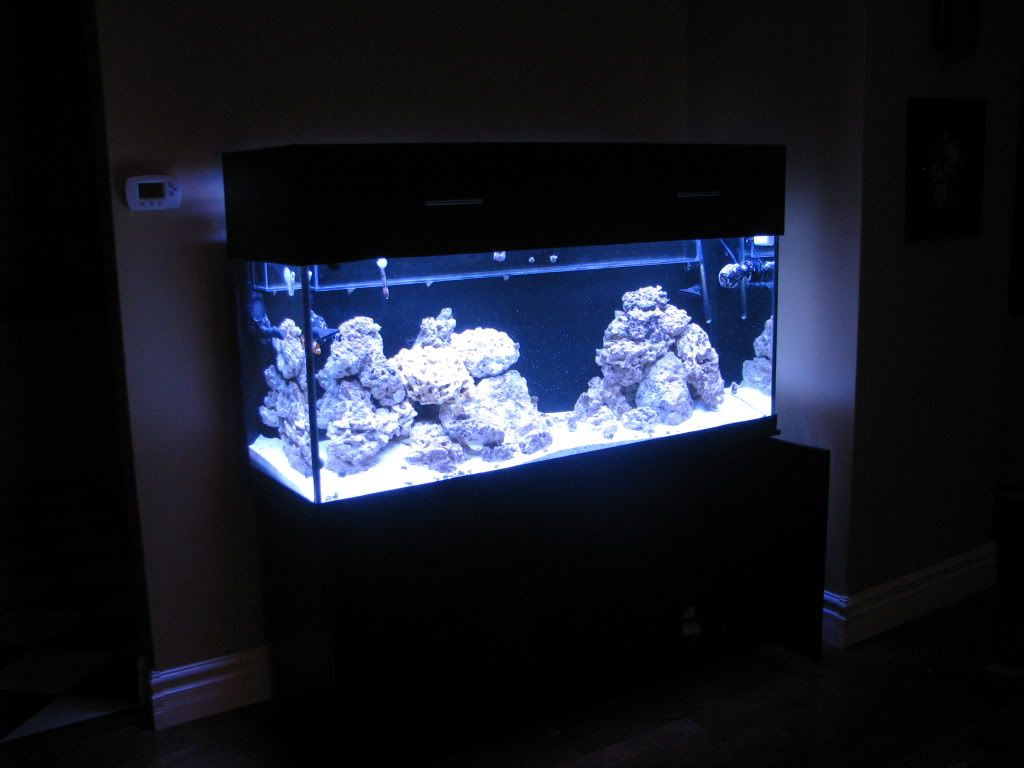
Anyways. The tank I am lighting is a 5' x 18"x24" 120gal glass tank. Nothign terribly special
The plan was to use 2 fixtures, one for each half of the tank. I decided to not use optics at all and just mount the fixture lower to the water surface. I did not want to have the fixture 12" above the tank and that they fit into the hood. Plus I am cheap, so it was an easy enough place to cut a corner. That being said, I have the room and the ability to add optics in thte future and to raise the fixture up to 10".Heres my parts list
Part List:
2 x 24" x 8.5" heatsinks from HeatsinkUsa
32 x CREE XP-G Cool White
8 x CREE XP-E Blue
3 x Arctic Alumina Thermal Adhesive 5g
50 x CREE XP-E Royal Blue
2 x CREE XP-E Red
1 x 12V 500mA Power supply for fan
1 x Fan speed controller 4 pin molex to two 3 pin fan
2 x Fan 120mm
2 x 120mm Fan Silencer
3 x Inventronics 75w driver - 700mA
Random Supplies:
100/140W Soldering Iron (not really needed but my 50W was taking too long)
Terminal Blocks
Terminal Block Jumpers
Various 22AWG Wire
Female MOLEX pins
Male MOLEX Pins
Female MOLEX Plug
Male MOLEX Plug
Spiral Wrap Stuff
Aluminum Angle
Aluminum 3/4" Square Tube
18"x 24" - 1/4" Lexan Sheet
Aluminum Rivets
And some other stuff I am sure I forgot.
The led stuff came from LEDGroupBuy.com (Thanks Milad)
The random electronic stuff was ordered from Newark and the random build supplies was from Home Depot.
Here are the prototype sketches made:
The general concept is illustrated below. The square tube sits on two aluminum angle iron rails mounted to the hood structure. This allows me to slide the fixtures towards the back of the tank when I need to get into it.
Here is the LED Layout I used in the build. I had a couple Trrue Violets ordered for each fixture but they turned ot to be a scam so I just replaced them with Moon Lighting Leds.
Anyways after waiting a month for my stuff to come into the Depot in Port Huron, I finally got an email saying my stuff had arrived. So I paid the bridge tolls and the depot. I basically saved 150 or more bucks by having it shipped to the states.
Unpacks to this. I was actually quite surprised how small the stuff was. I am not sure why but I figured everythign would be 1.5x larger
Joker card there to illustrate the size.
That is as far as I got on Day one because I was workgin nights and had to go to work.
Stay Tuned.