Letsdiscus

Member
Joined
Feb 27, 2017
Location
Ontario, Burlington
Stand build also done. nailed it through the 2x4 joists in the wall.
 

Attachments

  • IMG_6789.JPG
    IMG_6789.JPG
    29.1 KB · Views: 116
  • IMG_6792.JPG
    IMG_6792.JPG
    32.1 KB · Views: 116
  • IMG_6795.JPG
    IMG_6795.JPG
    28.9 KB · Views: 121

Nonuser

Distinguished Member
Joined
Mar 17, 2015
Location
Brantford
This might be the perfect tank dimensions. Kind of a shame the starphire sides will be hidden. So you won't be blacking out the sides.
 

Letsdiscus

Member
Joined
Feb 27, 2017
Location
Ontario, Burlington
This might be the perfect tank dimensions. Kind of a shame the starphire sides will be hidden. So you won't be blacking out the sides.

A great question. In fact i was planning to post this as a question to the folks on this forum for suggestions. it would b a waste to not see the sides unfortunately as placing the tank in the basement was not the original plan during the order. :(

So need some options. Would painting the sides "black" be a better option or placing the black paper which "Big Als" sells would be better. Just want to keep options open for later if the paint can be removed in future?

Appreciate any inputs as that would be my next step prior plumbing...Thanks
 

EricTMah

Aquariums by Design
Joined
Mar 2, 2014
Location
Kitchener, Ontario
Website
www.aquariumsbydesign.ca
Paint it!
That will prevent any water spots dripping down between any background "paper"
Imo it looks terrible when you see water spots in places you can't clean.
But if you decide to you the background paper on the sides. Make sure the glass is spotless before installing and also make sure it's completely sealed at the top sides and bottom. This will also prevent water dripping between the glass and background.


Sony Xperia Z3
 

Letsdiscus

Member
Joined
Feb 27, 2017
Location
Ontario, Burlington
Paint it!
That will prevent any water spots dripping down between any background "paper"
Imo it looks terrible when you see water spots in places you can't clean.
But if you decide to you the background paper on the sides. Make sure the glass is spotless before installing and also make sure it's completely sealed at the top sides and bottom. This will also prevent water dripping between the glass and background.


Sony Xperia Z3
Thanks Eric. i think that's a well explained point on water drips. in this hobby how so ever we will be cautious there would be some spills over during cleaning etc..
i had a close look on the tank last evening and there is a small area few inches from the back glass to the black acrylic overflow which has been covered with the black film by Miracles.

I am hoping that stays the way it is so only the other section starting from the acrylic overflow wall to the front glass can be paint though i do have the euro brace at all edges.
 

Letsdiscus

Member
Joined
Feb 27, 2017
Location
Ontario, Burlington
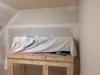
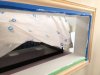
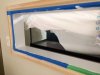
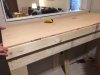
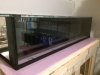
my babies currently housed in between my sump and brute container.. cant wait to give them more space and freedom..

Equipment List run down so far.. most of them existing from earlier 90 gallon and some new toys purchased...

from Old Setup-
- GHL Mitras LED
-Ecotech MP10 (driver side has stopped working just at 2 years of purchase). This is kinda disappointment for an Ecotech product. Their CS mentioned they cant do anything since its over warranty period.. sucks. Did not expect it to go down just within 2 years.
-Apex Lite controller)
-Apex DOS (Cal and Alk dossing. From old setup.. Awesome equipment. I like to keep my Alk between 11.5 -12 and have seen most of my LPS kick back like there's no tomorrow.
-Super Reef Octopus SR 3000 Internal Protein skimmer (from old setup)
-Tunzee Auto top off
-Finnex 500W heater
-Tonga rocks
-Reef Octopus Water Blaster 10000 (Return Pump). This might sound an overkill as i was using it for just 6 months in the old setup pumping return from basement all the way to main level Display tank.
-Carbon /GFO reactors (mix between Phosban 150 and RLSS FR4 cone ). Plan to replace both and buy Dual by Spectrapure


New Setup-

-Ecotech MP40 quiet drive (This is a brand new toy waiting to be installed on the new setup). Hoping it lasts longer than 2 years :)
-Tunzee Nanostream 6095 with controller. (for new setup) I love this guy.. its been running currently in the Brute container and is an amazing piece
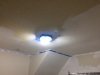
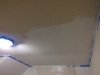
- KESSIL A360N-E Tuna Blue Narrow angle LED
- Kessil LED controller
-Bubble Magus Dosing stand alone- Plan this for Red Sea PO4/NO3 auto dosing

Not sure if i missed out anything .. :)
 

Attachments

  • IMG_7039.JPG
    IMG_7039.JPG
    38.7 KB · Views: 92

Letsdiscus

Member
Joined
Feb 27, 2017
Location
Ontario, Burlington
More updates done over past few days including weekend.
-Had to get the dry wall and the opening for the tank plumbing done through the stand..
-Connection for N/w cable for Apex
-made opening under sand for each 5 bulkhead holes
 

Attachments

  • IMG_6820.JPG
    IMG_6820.JPG
    19.6 KB · Views: 83
  • IMG_6821.JPG
    IMG_6821.JPG
    21.3 KB · Views: 80
  • IMG_6822.JPG
    IMG_6822.JPG
    19.5 KB · Views: 76
  • IMG_6825.JPG
    IMG_6825.JPG
    26.3 KB · Views: 96
  • IMG_6846.JPG
    IMG_6846.JPG
    29.5 KB · Views: 78
  • IMG_6847.JPG
    IMG_6847.JPG
    25.4 KB · Views: 97
  • IMG_6848.JPG
    IMG_6848.JPG
    14.5 KB · Views: 75
  • IMG_6861.JPG
    IMG_6861.JPG
    8.8 KB · Views: 76
  • IMG_6867.JPG
    IMG_6867.JPG
    26.8 KB · Views: 75
  • IMG_6869.JPG
    IMG_6869.JPG
    24.9 KB · Views: 82

Letsdiscus

Member
Joined
Feb 27, 2017
Location
Ontario, Burlington
-painted Stucco Ceiling with oil based paint. looked pretty old prior.had to paint it off to keep things looking new
 

Attachments

  • IMG_6914.JPG
    IMG_6914.JPG
    25.2 KB · Views: 104
  • IMG_6915.JPG
    IMG_6915.JPG
    22.7 KB · Views: 91
  • IMG_6917.JPG
    IMG_6917.JPG
    26.8 KB · Views: 82

Letsdiscus

Member
Joined
Feb 27, 2017
Location
Ontario, Burlington
Past few days had been crazy busy with work and family. Managed to get some time in night to catch up on the build..
-Dry wall prep for painting
-painting of the whole room
-Painting of the Stand with Zenzer white
-Treatment of concrete floor with Epoxy paint and Clear protect
-Testing of Network connection
 

Attachments

  • IMG_7016.JPG
    IMG_7016.JPG
    20.3 KB · Views: 82
  • IMG_7017.JPG
    IMG_7017.JPG
    13.2 KB · Views: 65
  • IMG_7018.JPG
    IMG_7018.JPG
    16.5 KB · Views: 62
  • IMG_7019.JPG
    IMG_7019.JPG
    24.2 KB · Views: 62
  • IMG_7028.JPG
    IMG_7028.JPG
    23 KB · Views: 64
  • IMG_7029.JPG
    IMG_7029.JPG
    22.6 KB · Views: 80
  • IMG_7030.JPG
    IMG_7030.JPG
    23.3 KB · Views: 58
  • IMG_7033.JPG
    IMG_7033.JPG
    39.8 KB · Views: 61
  • IMG_7034.JPG
    IMG_7034.JPG
    30.2 KB · Views: 62

Letsdiscus

Member
Joined
Feb 27, 2017
Location
Ontario, Burlington
Casing of the inside frame...I prefer keeping both sides of the tank looking great and in order and not just the Display side :)
Also painted the wooden frame from outside..and added few details to the stand from the fish room facing end.
 

Attachments

  • IMG_7031.JPG
    IMG_7031.JPG
    31.2 KB · Views: 68
  • IMG_7032.JPG
    IMG_7032.JPG
    29 KB · Views: 62
  • IMG_7035.JPG
    IMG_7035.JPG
    32.1 KB · Views: 63
  • IMG_7051.JPG
    IMG_7051.JPG
    26 KB · Views: 87
  • IMG_7052.JPG
    IMG_7052.JPG
    13.2 KB · Views: 58
  • IMG_7055.JPG
    IMG_7055.JPG
    38 KB · Views: 59
  • IMG_7056.JPG
    IMG_7056.JPG
    38.8 KB · Views: 87
  • IMG_7064.JPG
    IMG_7064.JPG
    24.7 KB · Views: 80
  • IMG_7065.JPG
    IMG_7065.JPG
    24.4 KB · Views: 60
  • IMG_7066.JPG
    IMG_7066.JPG
    25 KB · Views: 60

Letsdiscus

Member
Joined
Feb 27, 2017
Location
Ontario, Burlington
And - Lights added for the sump section below the stand..
 

Attachments

  • IMG_7075.JPG
    IMG_7075.JPG
    160.8 KB · Views: 76
  • IMG_7076.JPG
    IMG_7076.JPG
    188.5 KB · Views: 79
  • IMG_7080.JPG
    IMG_7080.JPG
    168.9 KB · Views: 59
  • IMG_7081.JPG
    IMG_7081.JPG
    168 KB · Views: 60

Letsdiscus

Member
Joined
Feb 27, 2017
Location
Ontario, Burlington
Next stage plumbing finally.. cant wait.. Planning on Bean animal. Current overflow is end to end 5 ft with 5 1" holes-

2 Holes- Main Overflow- Bean Animal
1- Emergency
2- One each for returns

Any of you currently using Bean animal for overflow with 1" Bulkheads. have read Bean's thread on Reef Central and looks like he is using 1" bulkhead but with an 1.5" adaptor for main 2 overflows.
So iam not sure if i need to plan the main 2 drains to be 1.5" or just 1" would be enough.
appreciate any thoughts from folks using either or . Thanks
 

Dr. Zoos

Member
Joined
Apr 2, 2014
Location
Woodstock, Ontario
Mine was 1" but I used 2" elbows inside the tank. The second cap with vent was changed after pic was taken. I think you need the larger intake to get the full force of the siphon without it being constricted right from the start the third elbow was already attached to its respective bulkhead. I only valved the main siphon and left the trickle drain to flow as it needed. Obv no valve should be on an emergency drain. Yes the second bent is still on the main in the pic and the valve is closed but I was taking a photo opt while I remembered.
IMG_0247.JPG

IMG_0257.JPG
 
Last edited:

Letsdiscus

Member
Joined
Feb 27, 2017
Location
Ontario, Burlington
View attachment 12954 View attachment 12953 Mine was 1" but I used 2" elbows inside the tank. The second cap with vent was changed after pic was taken. I think you need the larger intake to get the full force of the siphon without it being constricted right from the start the third elbow was already attached to its respective bulkhead. View attachment 12953

Thanks for sharing the pics.- SO is it ok to keep the elbows in the overflow to 1.5" with 1" while the rest of the pipe to be 1" which goes in sump OR
Keep both Main Overflows to be 1.5" by plumbing a 1"- 1.5" adaptor on the bulkheads both inside the overflow and on the outer end of the bulkhead leading the drain to Sump.

Also the 1/4" flexi hose connected to the main drain- Do we need to terminate the other end below the water line of the overflow or just above it?

Trying to get my thoughts clear before i start purchasing plumbing parts.. many thanks
 

Dr. Zoos

Member
Joined
Apr 2, 2014
Location
Woodstock, Ontario
Ok soooo I'll try my best here......
Yes keep the intake side of the elbow larger then the actuall pipe so 1 1/2" elbow reduced to 1" will work fine.
-the top of the main siphon needs NO flex line. I was redoing someone else's overflow on a used tank so I took that line out and plugged the hole. It should just be another elbow. The air line goes on the top of the trickle drain and yes it needs to be just above the regular operating level in the overflow......being as such water will trickle down that drain constantly but when the water raises for some issue(only time it should ever happen) that line will seal with water creating a second siphon and quickly suck out the excess water.
Does that help explain it?
 
Top