nevek67
New Member
- Joined
- Sep 26, 2016
- Location
- Orangeville, Ont
Hey guys, I am new to this forum but I thought I would share the process.
First and foremost this will be a slow build as its being incorporated into basement reno's which I am doing myself.
I currently have a 125g 72"x18"x24" its a sump less set up running with a SWC HOB skimmer and a small undersized fluval canister filter with carbon and just live rock.
about 100lbs of live rock, LPS heavy
Livestock:
Yellow Tang
Mag Foxface
2 Percula Clowns
1 Onyx clown
6 line wrasse
scooter blenny
Orange spot goby
Skunk Cleaner
Coral Banded
Fighting Conch
2 flame tip bubble nems
Corals
Purple tip green frogspawn
green tip hammer
all green hammer
purple anchor
cup coral - green
green/pink acan
purple pink acan
Various Zoas
2 large toadstools
various duncans large and small
GSP
Colt coral
Finger leather
red w/purple spot mushrooms
some mushroom I got very cheap cause the store ripped it taking it out of the tank
2 species of lrg hairy mushroom
I'm probably missing some..you get the jist
Anyway you may have seen a post me selling everything, and that was the case, instead we decided go ahead and upgrade. I was never really happy not having a sump. Anyway I am incorporating it into the basement renos (yes I get my own fish room!!)
I'll let you all come along for the ride if you want
upgrading to a 60"x30"x12" (slightly less gallons) frag tank
So I will set up a shallow reef tank.
60 g Sump with a Vertex IN280 in sump skimmer
Return is a Jabao DC7000
for now I'm running a 6' Current USA T5/MH light, Looking for something similar at 5' over the next while.
Sorry there are no pictures right now. when I get home I'll take pics of the tank getting cleaned (and leak testing as its bought used)
Skimmer is in a bath of vinegar and water running to clean it up a little.
Be patient this will be a slow build thread. Looking forward to any advise of tips you have or wish to impart.
Kevin
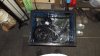
") here you can also see the future sump 60g.
here you can also see the future sump 60g.